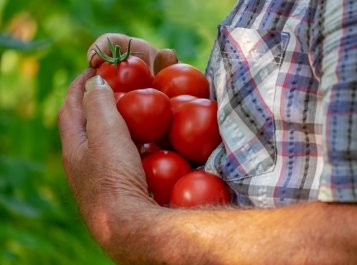
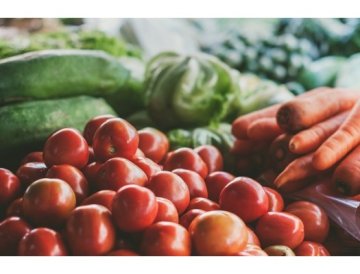
I'm pleased to meet you, I'm CITY TOMATO!
The word "tomato" comes from the Nahuatl word "tomatl". Why not create your own tomato paradise on your city balcony? Just a few plants are enough!

The word "tomato" comes from the Nahuatl word "tomatl". Why not create your own tomato paradise on your city balcony? Just a few plants are enough!
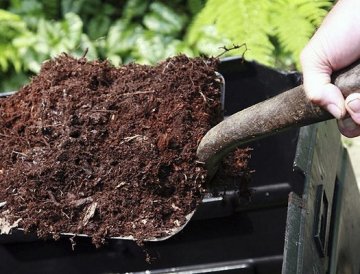
Composting is one of the most natural and efficient ways to recycle organic waste from your garden and household. A properly maintained compost bin not only reduces the amount of waste you need to dispose of, but also provides you with high-quality compost that's perfect for improving soil and nourishing your plants. Let's take a look at how to compost properly so you can achieve the best results.
Composting is the natural decomposition process of organic materials by microorganisms, fungi, and other creatures. The result is nutrient-rich compost that you can use as a natural fertilizer for your garden. Composting helps reduce landfill waste, decreases methane emissions, and returns valuable nutrients back to the soil.
Starting composting is easier than you might think. All you need is a suitable location, a compost bin or pile, and basic knowledge about what belongs in the compost and what doesn't.
The ideal place for a compost bin is a shaded or semi-shaded spot with good drainage. Direct sunlight can dry out the compost too quickly, while complete shade might slow down the decomposition process. The compost should be easily accessible so you can regularly add new materials and turn it.
You can choose from several types of compost bins:
The key to successful composting is the right mix of materials. You should combine "green" materials rich in nitrogen with "brown" materials rich in carbon.
Composting isn't just about throwing waste into a pile. Regular maintenance is the key to quick and quality decomposition.
The ideal ratio is approximately 2:1 or 3:1 of brown to green materials. Too much green material can cause the compost to smell unpleasantly, while too much brown material slows down the decomposition process.
The compost should be moist but not waterlogged. The ideal moisture level is similar to a wrung-out sponge. If the compost is too dry, add water or fresh green materials. If it's too wet, add more brown materials and turn the pile.
Regular turning of the compost is essential for proper aeration and speeding up decomposition. Turn the compost at least once every two weeks using a pitchfork or special aerator. This brings oxygen to microorganisms that need it for efficient work.
A properly functioning compost reaches temperatures between 50-70°C in its center. This temperature kills weed seeds and pathogens. If the compost isn't heating up, it may lack nitrogen (add green materials) or be too dry.
Quality compost is ready after 3-6 months in summer or 6-12 months during cooler months. Finished compost has a dark brown color, crumbly structure, and pleasant earthy smell. Original materials should be unrecognizable.
If the compost smells of ammonia or rot, there's too much green material or insufficient aeration. Add brown materials and turn the pile more frequently.
Flies, rodents, and other pests can be attracted to improperly managed compost. Don't add meat, fats, or dairy products, and cover fresh waste with a layer of brown materials.
If the compost isn't decomposing quickly enough, it may lack nitrogen, moisture, or oxygen. Add green materials, check moisture levels, and turn regularly.
Composting is a simple, economical, and environmentally friendly way to handle organic waste while gaining quality fertilizer for your garden. With the right approach and regular maintenance, you can enjoy rich, nutritious compost that will help your plants thrive. Start composting today and contribute to a healthier environment for future generations.
When you harvest your radishes, lettuce and other early crops in June, you can immediately start making new sowings. You have plenty of vegetable varieties to choose from that are suitable for June sowing or year-round cultivation, which will grow without problems before autumn arrives.
Although you're currently enjoying the first wave of early vegetable harvests, it's still the perfect time for sowing and planting many types of crops. However, the main stars of the June garden are undoubtedly the ripening strawberries you've been looking forward to all year long.
Home-grown mushrooms or oyster mushrooms? Why not? All you need to do is learn the growing principles, which aren't complicated at all, get some spawn and get started! Soon you'll be growing mushrooms as commonly as potatoes.
Early vegetables from spring sowings are already harvested and you're wondering what to do with the empty beds? You actually have plenty of options for what you can still grow during summer. Seeds of leafy greens, herbs, radishes and other species are waiting to show themselves to the world as plants under your care.
Tomatoes are extremely popular and rank among the most commonly grown crops in gardens. Although the history of tomatoes reaches back further than we can even trace, in Europe we have only been enjoying their juicy flavor for a few centuries. How can you navigate through the varieties and what are the principles for a bountiful harvest?
They're among the most common types of vegetables grown in gardens, you probably know them in all culinary preparations, yet they can still surprise you with something new. Lettuce, peppers, tomatoes, carrots and cucumbers are anything but boring! Try a new variety this year, choose a quality seed brand and then just water and wait to see what nature and vegetable breeders have prepared for you.
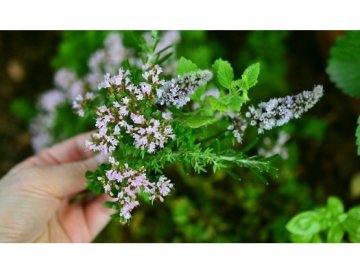
They thrive in garden beds and planters alike, all smell wonderful, are healthy and look beautiful. Growing them is easy even for complete beginners, and in the kitchen they help you create the most delicious dishes. What are these miraculous plants? Herbs, of course!
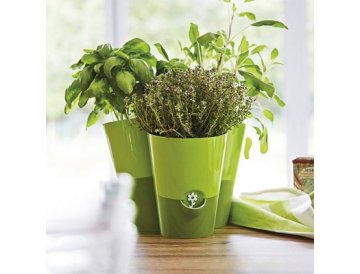
One of the few gardens that frost can't destroy is the home garden behind your window. Flowers on the windowsill make your home pleasantly cozy, are almost maintenance-free, and are ideal even for those of you who don't have a garden but still long to have a piece of nature at home. You no longer need to buy dried herbs – the freshest ones will grow right under your nose!

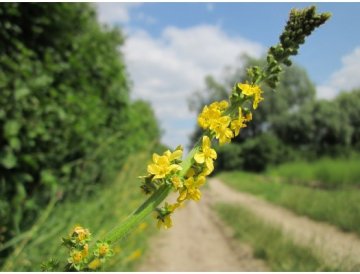
Plantain grows abundantly in Europe and Asia in meadows, field margins, country roads, ditches, embankments and light forests, but also as a weed in gardens and fields, particularly in clover fields.
Garden parsley is a biennial herb. In the first year, it produces only a rosette of basal leaves, and it's not until the second year that a hollow, flowering stem grows, branching in the upper part and reaching up to 1 meter in height.
Garden parsley is a biennial herb. In the first year, it only forms a rosette of basal leaves, and only in the second year does a hollow, branched flower stem grow, reaching up to 1 meter in height.
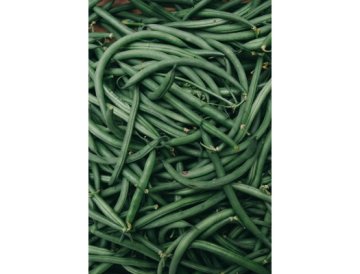
We know more than 25 species of bean varieties. All types of beans, with the exception of broad beans, which were already known to the ancient Romans, originate from the tropical and subtropical zones of the New World.
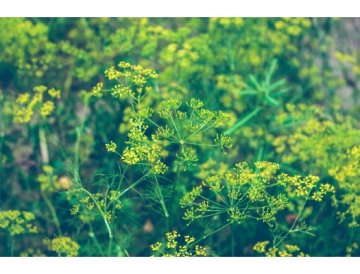
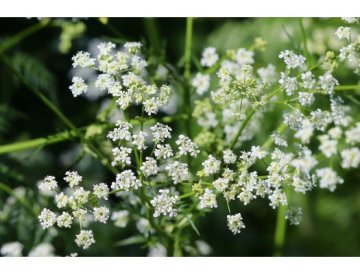
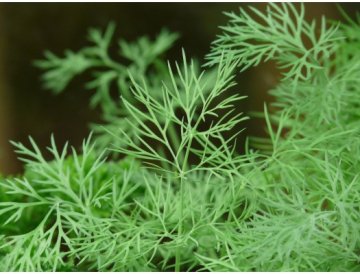
Dill (lat. Anethum graveolens) belongs to the Apiaceae family. Dill was a popular culinary and medicinal herb even among the ancient Egyptians and Romans.
Are you trying to be responsible towards your health? Are you attempting to avoid snacking and incorporate vegetables, fruits, and other beneficial foods into your diet more frequently? The foundation of vitality and unwavering human stability is immune resilience.
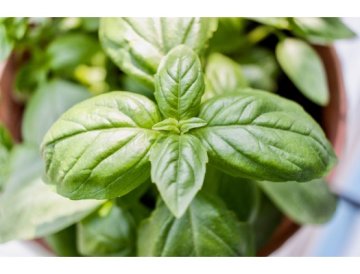
Basil is a popular aromatic and medicinal herb that is commonly grown and used in our households. We use it in the kitchen to season dishes, to prepare the world-famous Italian pesto, but also as a remedy to relieve all types of cramps.
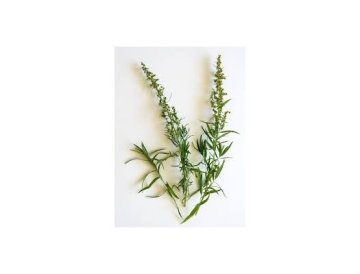
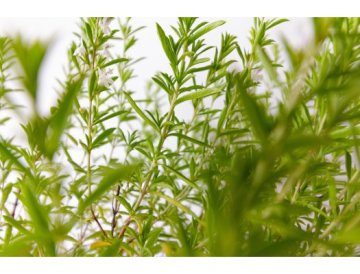
Tarragon wormwood is an easy-to-grow herb that finds its place in Provençal blends, meat seasoning, and cocktail preparation.
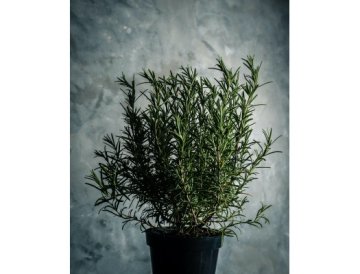
Rosemary is a herb that should not be missing from any kitchen table.

Kiwano was discovered in Europe quite recently and immediately gained great popularity for its unconventional appearance and undemanding cultivation. Grow your own horned melons - kiwano.
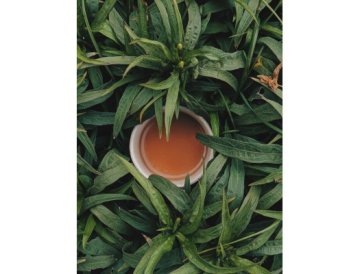
Who wouldn't love a cup of delicious tea, and one made from your own harvest will be even better.
Most herbs love full sun, but there are also those that appreciate partial shade.
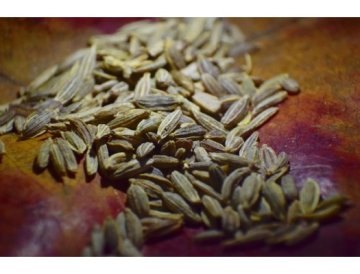
Anise is an annual undemanding herb that finds its place in the kitchen, especially in warm cuisine. It has a sweet taste and is also suitable for people with digestive problems.
Anise seeds are widely used in cooking and baking. They add a distinctive sweet-spicy flavour to various dishes, from bread and pastries to meat dishes and liqueurs. In Mediterranean and Middle Eastern cuisine, anise is an essential ingredient that gives dishes their characteristic taste.
Anise has been valued for centuries for its medicinal properties. It helps with:
Anise is an easy-to-grow plant that thrives in sunny locations with well-drained soil. It's ideal for beginners in herb growing as it doesn't require special care. Seeds are sown directly outdoors in spring, and the harvest takes place in late summer when the seeds are fully ripe.
Garden broad bean is a traditional vegetable that is slowly falling into oblivion. However, this legume deserves our attention not only for its exceptional nutritional value, but also for its ease of cultivation and ability to improve soil quality. In this comprehensive guide, you'll learn everything you need to know about growing garden broad beans – from soil preparation to harvest and use in the kitchen.
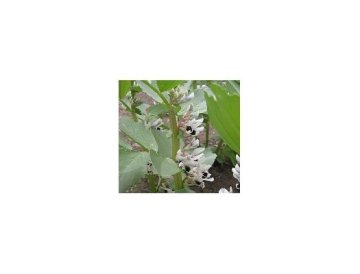
Garden broad bean (Vicia faba), also known as fava bean or horse bean, is one of the oldest cultivated plants in Europe. This annual legume can reach heights of 60-150 cm depending on the variety. Its distinctive features include upright growth, grey-green leaves and white flowers with characteristic black spots.
Main benefits of growing broad beans:
Broad beans are divided into several types according to seed size and intended use:
These varieties have large, flat seeds and are ideal for fresh consumption. They mature later but offer the best taste. Popular varieties include 'Hangdown Giant' and 'Imperial Green Longpod'.
Universal varieties suitable for both fresh and dried consumption. They offer a good balance between yield and taste quality. Try varieties like 'The Sutton' or 'Aquadulce'.
These are mainly used for drying and animal feed. They are the most productive but have lower culinary value.
Success in growing broad beans starts with proper soil preparation. Broad beans prefer heavy clay soils with neutral to slightly alkaline pH (6.5-7.5).
Broad beans are among the earliest vegetables you can sow:
Broad beans can be sown directly outdoors or pre-germinated:
Tip: Pre-soaking seeds in water for 24 hours before sowing speeds up germination.
Although broad beans are undemanding, proper care significantly increases yield and quality.
Broad beans have deep roots and are relatively drought-resistant. However, regular watering is important during flowering and pod development. Water thoroughly but less frequently – approximately 20-30 litres per m² weekly during dry periods.
As legumes, broad beans fix atmospheric nitrogen and therefore don't need much nitrogen fertilisation. Focus instead on:
Apply a complex vegetable fertiliser with lower nitrogen content during bud formation.
Taller varieties need support to prevent lodging. Use stakes or stretch string between posts along rows. When plants reach the desired height (usually when the first pods form), pinch out growing tips. This encourages pod development and helps prevent black bean aphid infestation.
Regular weeding is important, especially in the early growth stages. Once plants are well established, apply a layer of mulch around them to:
The most common broad bean pest. Black aphids colonise the growing tips and young pods. Prevention:
Fungal disease manifesting as brown spots on leaves. Prevention is better than cure:
The harvest period depends on sowing date and intended use:
For fresh consumption, harvest when seeds are fully developed but still soft. Pods should be firm and green.
Fresh beans:
Dried beans:
Broad beans are a versatile ingredient offering many culinary possibilities:
Young, small beans can be eaten whole including the pod. Prepare them similarly to green beans – boil, steam or sauté.
Larger green seeds are best after removing the outer skin. Use them in:
Dried broad beans need longer cooking (1-2 hours after overnight soaking). They're ideal for:
Broad beans are an excellent preceding crop for many vegetables. Thanks to nitrogen fixation, they leave soil enriched with this important nutrient. Ideal crops to follow broad beans include:
After harvest, don't pull up plants but cut them at ground level. Leave roots in soil to decompose and release fixed nitrogen.
Growing garden broad beans is rewarding for any gardener. This traditional vegetable offers high nutritional value, improves soil quality and is easy to grow. With proper variety selection, timely sowing and basic care, you can look forward to a bountiful harvest of fresh, healthy beans. Don't let this valuable crop fall into complete oblivion – give broad beans a place in your garden and discover their unique taste and benefits.
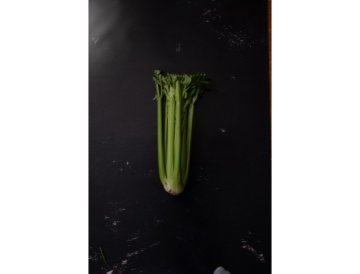
Celery comes in 3 types: leaf celery, celeriac (root celery), and stalk celery. It's an undemanding vegetable that's essential in soups and diets.
Vegetables, along with lean meat, form the basis of the diet for people following a diabetic meal plan. Vegetables contain low amounts of sugar, but are rich in beneficial fiber, vitamins and minerals.
Fill your home with a pleasant menthol or citrus aroma. Eucalyptus is easy to grow, highly decorative, and has healing properties. Read more...
The shii-take (shiitake) mushroom is known for its healing effects, particularly on lifestyle diseases. In Asian cuisine, especially Japanese cooking, it is used to prepare many dishes because it has a very distinctive mushroom flavor. The Japanese even call it the "pearl among mushrooms."
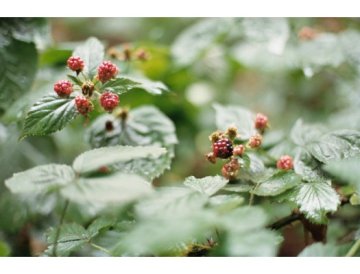
Strawberries, raspberries, blueberries, and other forest fruits are among the most natural sources of vitamins and energy in our regions. They are valuable sources of various elements and healing substances. Some of them have almost magical positive effects, especially on the aging process of the body.
Much is known about tobacco, but did you know that... you can grow it at home as an ornamental plant? That it blooms in the evening with delicate flowers? Read more about growing and drying tobacco...
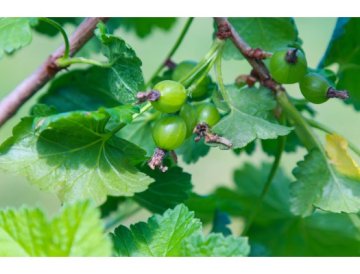
Gooseberries are a fruit that all of us certainly know, but did you know how many vitamins they contain and what delicious treats you can make from them?
Vegetable mini gardens are becoming increasingly popular. They appear not only on terraces or balconies, but also on windowsills or simply in households.
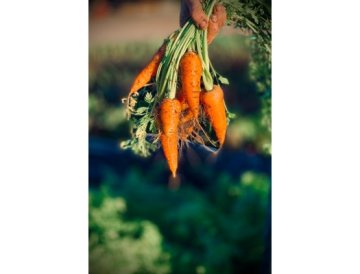
The common carrot (Daucus carota subsp. sativus) is one of the most popular and widely grown vegetables worldwide. This root vegetable has earned its place in gardens and on tables thanks to its excellent nutritional value, versatility in the kitchen, and relatively undemanding cultivation requirements.
Although we associate the carrot with its characteristic orange color today, the original wild forms were purple, yellow, or white. The orange carrot we know today was developed in the Netherlands in the 17th century through selective breeding. The carrot originates from Central Asia and the Mediterranean region, where it has been cultivated for over 5,000 years.
Carrots are an exceptional source of beta-carotene, which the body converts into vitamin A. This vitamin is essential for good eyesight, healthy skin, and proper immune system function. Additionally, carrots contain:
Regular consumption of carrots may contribute to reducing the risk of cardiovascular diseases and certain types of cancer.
Carrots thrive best in deep, loose, and well-drained soil. Heavy clay soils can cause root deformation and hinder their development. The ideal pH ranges from 6.0 to 6.8. Before sowing, it's recommended to work the soil thoroughly to a depth of at least 30 cm and add well-decomposed compost.
Carrots are sown directly into the ground as they don't tolerate transplanting well. The optimal time for sowing is from March to July, depending on the variety and desired harvest time:
Seeds are sown to a depth of 1-2 cm in rows spaced 25-30 cm apart. After germination, seedlings should be thinned so that individual plants are 5-8 cm apart.
Regular watering is key to quality carrot cultivation. Uneven moisture can cause root cracking. The soil should be consistently moist but not waterlogged. During dry periods, water 2-3 times per week.
Weeding is especially important in the early stages of growth when young carrot plants are easily overgrown by weeds. Regular shallow hoeing between rows helps maintain soil looseness and reduce weeds.
Fertilization should be moderate. Carrots don't require excessive nitrogen, which would promote leaf growth at the expense of roots. It's better to focus on phosphorus and potassium. Suitable products include specialized vegetable fertilizers or well-decomposed compost.
The most serious pest of carrots. Larvae tunnel into roots, causing them to rot. Prevention includes crop rotation, sowing at optimal times, and using protective nets.
Microscopic worms that cause root deformation and growth stunting. Prevention involves crop rotation and choosing resistant varieties.
Carrots can be affected by various fungal diseases such as Alternaria leaf blight or powdery mildew. Prevention includes ensuring good air circulation, avoiding excessive watering, and removing infected plants.
Carrots are ready for harvest when roots reach the appropriate size for the given variety – typically 60-80 days after sowing for early varieties, 100-120 days for late varieties. Harvest is best done in dry weather.
For long-term storage, choose late varieties. After harvest, remove the tops (leaving about 1 cm), allow roots to dry, and store them in a cool, dark place at a temperature of 0-4°C and high humidity. Properly stored carrots will last until spring.
Growing common carrots is accessible even for beginning gardeners. With basic knowledge of their requirements and proper care, you can enjoy a bountiful harvest of this healthy and tasty vegetable. Whether you grow carrots for fresh consumption or winter storage, this crop will reward your efforts with excellent flavor and nutritional value.
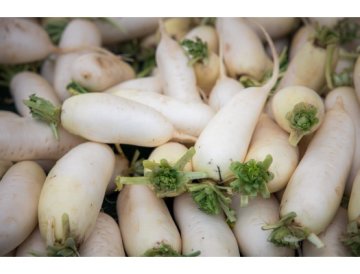
Radish is a wonderful vegetable with a delicate to pungent flavour. Nothing compares to it.
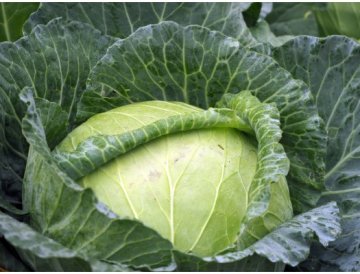
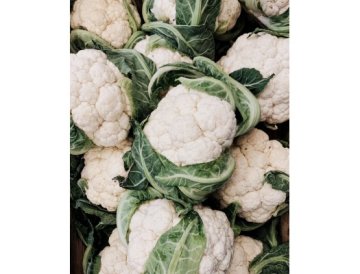
Brassica vegetables belong to the most popular and widely grown crops in vegetable gardens worldwide. This diverse family includes cabbage, cauliflower, broccoli, Brussels sprouts, kale, kohlrabi and many other varieties that are prized for their excellent taste and high nutritional value.
Brassicas are among the healthiest vegetables you can include in your diet. They're rich in vitamin C, vitamin K, fibre and contain powerful antioxidants that support the immune system and overall health. Many varieties are also cold-hardy, making them perfect for autumn and winter harvests.
Brassicas prefer well-drained, nutrient-rich soil with a pH of 6.5-7.5. They're heavy feeders that benefit from soil enriched with compost or well-rotted manure before planting. Good soil structure is essential for developing strong roots and healthy heads.
Most brassicas can be started from seed indoors 4-6 weeks before the last frost, or sown directly outdoors once soil temperatures reach at least 10°C. For continuous harvest, consider succession planting every 2-3 weeks.
Spacing is crucial - adequate distance between plants ensures good air circulation, reducing disease risk. Most varieties need 45-60 cm between plants, though specific requirements vary by type.
As heavy feeders, brassicas require regular fertilisation throughout the growing season. Use a balanced fertiliser high in nitrogen for leafy growth, transitioning to higher potassium formulations as heads begin to form.
Popular organic options include BioBizz Bio-Grow for vegetative growth and BioBizz Bio-Bloom when plants begin forming heads. For conventional fertilisers, look for NPK ratios suited to leafy vegetables.
Consistent moisture is essential for quality brassica production. Irregular watering can lead to splitting, bolting or poor head formation. The key is maintaining evenly moist soil without waterlogging.
Brassicas are susceptible to several pests and diseases, but with proper management, you can minimise damage and enjoy healthy harvests.
Harvest timing varies by variety, but generally, brassicas are ready when heads are firm and fully formed. Don't wait too long - overripe brassicas may split, bolt or develop off-flavours.
Most brassicas taste sweetest after exposure to light frost, which converts starches to sugars. Many varieties can be left in the garden well into winter for fresh harvests.
Fresh brassicas store well in cool, humid conditions. Most varieties keep for 1-2 weeks in the refrigerator's crisper drawer. For longer storage, consider:
Practising crop rotation is essential when growing brassicas. Avoid planting them in the same location more than once every 3-4 years to prevent disease build-up and soil nutrient depletion. Follow brassicas with legumes or other nitrogen-fixing crops to restore soil fertility.
Growing brassica vegetables is rewarding and relatively straightforward with proper care. By providing nutrient-rich soil, consistent watering, appropriate fertilisation and vigilant pest management, you'll enjoy abundant harvests of these nutritious, delicious vegetables throughout much of the year. Whether you're a beginner or experienced gardener, brassicas deserve a prominent place in every vegetable garden.
Are you just starting out with growing brassica vegetables? If so, read this article to learn the essential tips for successful cultivation of cauliflower, broccoli, and Chinese cabbage in your garden.
Brassica vegetables belong to the Brassicaceae family and include popular crops such as cauliflower, broccoli, and Chinese cabbage. These vegetables are prized for their nutritional value, rich vitamin content, and versatility in cooking. They thrive in cooler temperatures and are ideal for spring and autumn cultivation.
Cauliflower is one of the most demanding brassica vegetables, but with proper care, you can achieve excellent results. Here are the key factors for successful cultivation:
Broccoli is more forgiving than cauliflower and is suitable for beginning gardeners. It's also more resistant to temperature fluctuations and pests.
Chinese cabbage is an excellent choice for those who want quick results. This vegetable matures in just 60-80 days and is perfect for fresh salads or stir-frying.
Even experienced gardeners can encounter challenges when growing brassica vegetables. Here are the most common issues and how to address them:
Growing brassica vegetables like cauliflower, broccoli, and Chinese cabbage can be rewarding when you follow the basic principles of cultivation. Pay attention to proper watering, nutrient supply, and pest protection. With patience and care, you'll soon be harvesting fresh, healthy vegetables from your own garden.
September marks the beginning of a month when we care less for our vegetables but consume and harvest them much more. Some varieties still need our attention, and you can read about them now...

Rhubarb – can you already smell the rhubarb cake baking in your kitchen? Try sprinkling it with cinnamon sugar. Put your feet up for a moment, relax with a cup of good tea, and read our story about rhubarb...
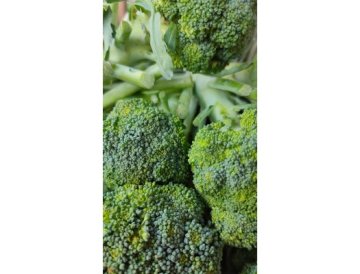
Broccoli is highly nutritious, with a high content of vitamins C, E, and A, which even exceeds that of cauliflower. It is also a source of fiber, calcium, iron, magnesium, and potassium, and has a high content of minerals. Among all brassicas, it contains the highest concentration of sulforaphane, a compound that inhibits cancer growth.
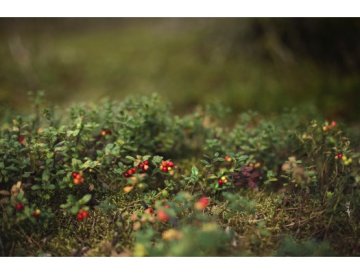
Cranberries (Vaccinium macrocarpon) are attractive evergreen shrubs that reward growers with delicious, healthy berries rich in vitamins and antioxidants. Successful cultivation requires understanding their specific needs - acidic soil, proper drainage, adequate sunlight, and appropriate watering.
Cranberries thrive in acidic substrate with pH 4.0-5.5. This is crucial for proper nutrient uptake and healthy growth. The substrate should be:
For container growing, use specialized acidic substrate for rhododendrons or blueberries. In garden beds, amend soil with peat moss and acidic compost. Avoid lime or alkaline materials that raise pH.
Cranberries prefer sunny to partially shaded locations. Ideal conditions include:
In warmer regions, light afternoon shade helps prevent stress. In cooler climates, maximum sun exposure ensures better berry development.
Cranberries require moderate, regular watering. Unlike their bog-growing relatives, garden cranberries don't need constant flooding:
Mulching with pine bark or acidic wood chips helps retain moisture and maintain soil acidity.
Feed cranberries with fertilizers for acid-loving plants:
Cranberries typically ripen in late summer to early fall. Harvest when berries are deep red and firm. Regular pruning after harvest promotes bushier growth and better fruiting the following year.
With proper care - acidic substrate, sunny location, and moderate watering - your cranberry plants will produce abundant, nutritious berries for years to come.
Growing lovage - nutritious, well-draining substrate, alkaline, sunny location or partial shade, moderate watering
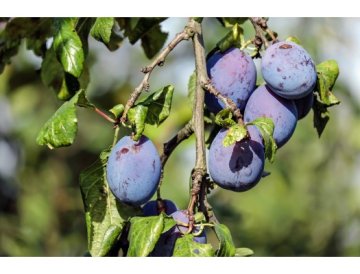
Plum trees (Prunus domestica) are among the most popular stone fruit trees in European gardens. With proper care and suitable growing conditions, they reward gardeners with abundant harvests of sweet, juicy fruits perfect for fresh consumption, preserves, or baking.
Plum trees thrive best in heavy clay soils that retain moisture well. Unlike many other fruit trees that prefer lighter, well-draining substrates, plums actually benefit from the water-holding capacity of clay-rich soils.
If your garden has sandy or overly light soil, improve it by adding compost, well-rotted manure, or bentonite clay to increase water retention and nutrient availability.
Plum trees are relatively flexible regarding light conditions and will perform well in both full sun and partial shade.
Choose a location protected from strong winds, which can damage blossoms in spring and reduce fruit set. Plum trees also benefit from good air circulation to minimize fungal diseases.
Plum trees require moderate watering - neither excessive moisture nor drought conditions. The key is maintaining consistent soil moisture without waterlogging.
Clay soils naturally retain moisture longer, so monitor soil moisture levels before watering. Overwatering in heavy soils can lead to root rot and other problems.
Apply organic fertilizer or well-rotted compost in early spring before new growth begins. Plums benefit from nitrogen-rich fertilizers, but avoid excessive feeding which can promote disease susceptibility.
Prune plum trees in late spring or summer (never in winter) to minimize disease risk. Remove dead, damaged, or crossing branches to maintain good tree structure and air circulation.
Growing plum trees successfully requires understanding their preference for heavy clay soils, flexibility with light conditions (tolerating both full sun and partial shade), and providing moderate, consistent watering. With these basic requirements met, your plum tree will establish well and provide delicious harvests for many years to come. Remember that patience is key - most plum trees begin bearing significant crops 3-5 years after planting.
Chervil (Anthriscus cerefolium) is an annual herb from the Apiaceae family that thrives in cooler conditions. This delicate culinary herb prefers partial to full shade and moderate watering, making it an ideal choice for shaded garden spots or indoor cultivation.
Chervil grows well in standard potting substrate or garden soil. The substrate should be:
A quality universal substrate mixed with compost provides excellent growing conditions for chervil.
Unlike many herbs, chervil prefers cooler, shadier locations:
Maintain moderate, consistent moisture:
Chervil is best grown from direct sowing:
For continuous harvest:
Chervil has modest nutrient requirements:
Chervil is ready for harvest 6-8 weeks after sowing:
Chervil bolts quickly in hot weather:
Chervil is generally pest-resistant:
With its preference for shade and moderate care requirements, chervil is an easy herb for gardeners seeking to utilize cooler, shadier spots in their garden or indoor growing space.

Coriander (Coriandrum sativum) is a popular herb used in cuisines worldwide. Successful cultivation requires meeting three key conditions: well-draining substrate, exclusively sunny location, and moderate watering. When these requirements are met, you'll enjoy abundant harvests of fresh leaves and aromatic seeds.
Coriander is extremely sensitive to waterlogging and root rot. The substrate must allow excess water to drain freely while retaining sufficient moisture for the roots.
If you're growing coriander in the garden and have heavy clay soil, improve drainage by:
Coriander requires full sun for at least 6-8 hours daily. Insufficient light results in weak, pale plants with less intense flavor.
Coriander thrives in temperatures between 15-25°C. At higher temperatures (above 30°C) combined with long days, the plant tends to bolt quickly - it produces flower stems at the expense of leaf production. Therefore:
Moderate watering means maintaining evenly moist but not waterlogged soil. Both drought and excess water harm coriander.
Coriander is best sown directly in its final location as it doesn't transplant well due to its sensitive taproot.
For continuous harvest, sow new batches every 2-3 weeks from spring to autumn. This ensures a constant supply of fresh leaves.
Coriander has moderate nutrient requirements:
The most common problem in coriander cultivation. Prevention:
Coriander is ideal for container growing on balconies and patios:
Growing coriander is rewarding when you respect its basic requirements. Well-draining substrate prevents root problems, exclusively sunny location ensures aromatic leaves, and moderate watering maintains optimal growth conditions. With regular harvesting and succession sowing, you'll enjoy fresh coriander from spring to autumn. Whether you grow it in the garden or in containers, coriander is an herb that will enrich your cuisine with its distinctive flavor and aroma.
Basil (Ocimum basilicum) is one of the most popular culinary herbs that you can easily grow both outdoors in the garden and indoors on a windowsill. This aromatic plant originally from tropical Asia brings not only an exceptional flavour to dishes but also decorates your home with its lush green leaves.
Basil thrives best in standard garden substrate that is light, well-draining and rich in nutrients. The ideal substrate should have:
You can use a quality potting mix for herbs or prepare your own mixture of garden soil, compost and perlite in a 2:1:1 ratio. If growing in containers, ensure pots have drainage holes at the bottom.
Basil is a sun-loving plant that requires at least 6-8 hours of direct sunlight daily. Choose a location where the plant receives maximum light, ideally:
Insufficient light leads to elongated, pale plants with less intense flavour. When growing indoors, you can supplement natural light with grow lights, especially during winter months.
Proper watering is crucial for healthy basil growth. This herb prefers consistently moist but not waterlogged soil. Follow these watering principles:
Overwatering is one of the most common causes of basil problems. Waterlogged roots quickly rot and the plant wilts. Conversely, completely dried-out substrate causes stress and leaf loss.
For optimal basil growth, follow these recommendations:
When growing basil, you may encounter these issues:
With proper care, including quality substrate, sunny location and moderate watering, you'll enjoy a bountiful harvest of fresh basil leaves throughout the season. This unpretentious herb rewards attentive care with intense aroma and flavour that will enhance your culinary creations.
Anise (Pimpinella anisum) is an annual herb valued for its aromatic seeds with a distinctive sweet-spicy flavor. Successful cultivation requires proper substrate, suitable location, and appropriate watering regime.
## Ideal Substrate for AniseAnise thrives in well-draining substrate with good structure. The soil should be:
For container growing, use quality universal potting soil mixed with perlite or sand for better drainage.
## Light Requirements and LocationAnise requires sufficient light for proper development:
In full sun, anise produces more aromatic seeds with higher essential oil content.
## Watering RegimeModerate watering is key to successful anise cultivation:
Young plants need more frequent watering, mature plants are relatively drought-tolerant.
## Sowing and CultivationAnise is grown from direct sowing in the garden or containers:
Anise seeds are harvested when they turn grey-green and begin to fall. Cut the entire plants, tie them in bundles, and hang upside down to dry. Store dried seeds in airtight containers in a dark, cool place.
## Common Problems and SolutionsWith proper care and suitable conditions, anise rewards you with aromatic seeds perfect for culinary and medicinal use.
The carob tree (Ceratonia siliqua) is an evergreen tree from the Mediterranean region that has been cultivated for thousands of years for its sweet pods. Although it comes from warmer climates, with proper care it can be successfully grown in containers in temperate zones. Growing carob trees requires patience, but the reward is an attractive plant with interesting fruits.
Carob trees are photophilic plants that need plenty of direct sunlight for healthy growth and potential fruit production. Ideally, place them in the sunniest spot you have available - a south-facing window, conservatory, or sunny terrace during the summer months. In the wild, carob trees grow in open landscapes with full sun exposure.
Young plants can tolerate partial shade, but with limited light they will grow more slowly and may not develop the typical dense crown. For optimal development, provide at least 6-8 hours of direct sunlight daily. During winter, when days are shorter, you can supplement with grow lights to maintain vitality.
Although carob trees in nature tolerate even poor, stony soils, for container cultivation it's recommended to use a quality humus-rich substrate that ensures good drainage. The ideal mixture is:
Good drainage is key - carob trees don't tolerate waterlogged roots, which can lead to root rot. At the bottom of the container, always create a drainage layer of gravel or expanded clay.
Watering carob trees requires finding the right balance. While mature trees in nature are drought-tolerant, containerized plants need regular and generous watering, especially during the growing season. Water when the top layer of substrate (about 2-3 cm) dries out.
During summer, this may mean watering 2-3 times a week, depending on temperature and container size. In winter, reduce watering frequency, but don't let the substrate dry out completely. Always use room temperature water, ideally collected rainwater or softened water.
Regarding air humidity, carob trees adapt well to normal room conditions. However, they appreciate occasional misting of leaves, especially in winter when heating dries the air. Optimal humidity is around 50-60%, which you can maintain by placing the container on a tray with wet gravel.
For healthy growth, carob trees need regular fertilizing during the growing season (March-September). Use a balanced liquid fertilizer for Mediterranean plants or universal fertilizer diluted to half strength. Fertilize every 2-3 weeks.
Carob trees belong to legumes and can bind atmospheric nitrogen through root nodules, but in container cultivation this ability is limited. Therefore, ensure adequate nitrogen supply, along with phosphorus and potassium. In winter, stop fertilizing completely.
Carob trees prefer warm conditions and grow best at temperatures of 20-28°C. They can tolerate brief drops to around 5°C, but prolonged cold damages them. Therefore, in temperate climates they must overwinter indoors.
Ideal overwintering is in a cool room with temperatures of 10-15°C and plenty of light. A conservatory, cool hallway or unheated bedroom is suitable. During winter, the plant enters a rest period - growth slows and watering needs are reduced.
Young carob trees grow relatively quickly and need repotting every 2-3 years into a larger container. Mature plants can remain in the same container longer, just refresh the top layer of substrate annually.
Pruning isn't essential but helps maintain shape and supports denser branching. Prune in early spring before new growth begins. Remove dry, damaged or improperly growing branches. Carob trees tolerate pruning well and can be shaped into an attractive tree or bushy form.
Carob trees can be propagated from seeds from ripe pods, though seedlings grow slowly and only bloom after many years. Before sowing, scarify seeds (lightly sand the seed coat) and soak in lukewarm water for 24 hours. Sow into moist substrate and maintain a temperature around 20-25°C. Germination takes 2-4 weeks.
Faster results come from buying grafted young plants, which can bear fruit after 4-5 years. Carob trees are dioecious, so for fruit production you need both male and female plants, or choose hermaphroditic cultivars.
Carob trees are relatively resistant, but problems can occur with improper care:
Prevention is key: ensure optimal growing conditions, don't overwater, and regularly inspect the plant for pest signs. Spider mites can be controlled by increasing humidity and spraying with water; scale insects should be removed mechanically and treated with appropriate preparations.
Besides ornamental value, carob trees are prized for their pods containing sweet pulp rich in fiber and minerals. Carob powder is used as a cocoa substitute, for baking and healthy desserts. It contains no caffeine and is suitable for people with chocolate allergies.
Growing carob at home offers the opportunity to experience this Mediterranean tree up close and with patience and proper care, potentially harvest your own pods. This plant rewards attention with decorative evergreen foliage and the possibility of tasting this traditional Mediterranean crop.
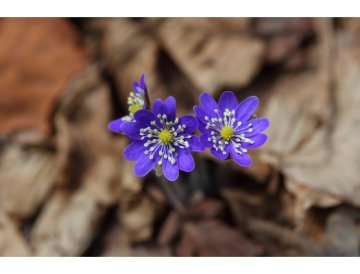
Hepatica (Hepatica nobilis) is a charming woodland perennial that thrives when provided with conditions mimicking its natural forest floor habitat. Success in growing this early spring bloomer depends on three key factors: proper substrate composition, appropriate light exposure, and consistent moisture management.
The foundation of successful hepatica cultivation lies in the soil composition. These plants require a well-draining substrate rich in organic matter that resembles the leaf-littered forest floor where they naturally occur.
Mix garden soil with approximately 40-50% leaf compost and 10-15% sand or perlite to create the perfect growing medium. The substrate should retain moisture while allowing excess water to drain freely, preventing root rot which can quickly damage these delicate plants.
Light exposure is critical for hepatica health and flowering performance. These shade-loving woodland plants struggle in full sun and require protection from intense light.
The perfect location mimics the understory of deciduous woodlands, where hepaticas receive filtered light in spring before trees fully leaf out, followed by deeper shade throughout summer. In gardens, plant them beneath deciduous shrubs, along north-facing walls, or in naturally shaded woodland areas.
While hepaticas require well-draining soil, they also need consistent moisture to thrive. The key is maintaining even soil moisture without waterlogging.
During the growing season from early spring through early summer, check soil moisture regularly. The substrate should feel like a wrung-out sponge - moist but not soggy. A 5-7 cm layer of organic mulch helps maintain consistent moisture levels while suppressing weeds and gradually enriching the soil.
This is the most critical period for hepaticas. As flowers emerge in early spring, ensure adequate moisture and remove any debris that accumulated over winter. The plants flower before or as new foliage emerges, creating a spectacular display.
Maintain consistent moisture as foliage matures. The deep shade and moisture-retentive soil become especially important during hot weather. Fresh foliage develops and builds energy reserves for next year's flowering.
Continue moderate watering as plants prepare for dormancy. Allow fallen leaves to accumulate around plants as natural mulch and protection.
Hepaticas are winter-hardy but appreciate protection from harsh winds and extreme temperature fluctuations. The evergreen or semi-evergreen foliage may persist through mild winters.
Growing hepatica successfully requires attention to their specific environmental preferences. By providing well-draining humus-rich substrate, partial to full shade, and generous consistent watering, you'll create ideal conditions for these delightful early spring bloomers. These charming woodland natives reward proper care with years of reliable flowering and attractive foliage, bringing the magic of the forest floor to your shaded garden spaces.
Cleavers (Galium aparine) is an annual plant from the Rubiaceae family that thrives in temperate climates. For successful cultivation, it's essential to provide well-draining soil, sufficient warmth, and direct sunlight. This unpretentious plant doesn't require intensive care, making it ideal for beginning gardeners.
## Soil and LocationCleavers prefers light, well-draining soil with neutral to slightly alkaline pH (6.5-7.5). Heavy clay soils should be improved with sand or compost to ensure proper drainage. The plant tolerates poorer soils but grows best in nutrient-rich substrates.
Choose a location with direct sunlight for at least 6 hours daily. Cleavers can handle partial shade, but full sun supports optimal growth and higher active compound content in the plant.
## Temperature RequirementsAs a cold-resistant plant, cleavers tolerates light frosts and germinates at soil temperatures around 5-10°C. Optimal growth occurs at temperatures between 15-25°C. In warmer climates, provide afternoon shade during the hottest summer months.
## Watering and MoistureOne of cleavers' greatest advantages is its minimal water requirements. The plant is drought-tolerant and prefers drier conditions. Water only during prolonged dry periods, when the soil is completely dry.
Sow cleavers directly outdoors in early spring (March-April) or autumn (September-October). Seeds germinate within 2-3 weeks. Plant spacing should be approximately 20-30 cm to allow plants sufficient room to spread.
Cleavers doesn't require fertilizing - excessive nutrients can lead to overgrowth at the expense of active compounds. If needed, apply light compost application in spring.
## Harvest and UseHarvest young shoots and leaves before flowering, when the plant contains the highest concentration of beneficial substances. Cleavers is traditionally used in herbal medicine as a detoxifying and diuretic remedy.
With proper soil drainage, adequate sunlight, and minimal watering, you'll achieve healthy cleavers plants suitable for further processing or direct use in the kitchen and natural medicine.
Savory (Satureja) is an unpretentious aromatic herb that thrives in most gardens and containers. Whether you choose summer savory (Satureja hortensis) or winter savory (Satureja montana), both species are easy to grow and reward gardeners with aromatic leaves perfect for culinary use.
## Ideal Growing Conditions for Savory ### Substrate and Soil RequirementsSavory isn't demanding when it comes to soil. It grows well in standard garden soil or universal potting substrate. The key requirements are:
If growing in containers, use quality potting mix with added perlite or sand for better drainage.
### Light Requirements - Sun or Partial ShadeSavory is a sun-loving herb that performs best in:
In hotter climates, light afternoon shade can prevent leaf scorching during peak summer.
## Watering Savory - Moderate ApproachProper watering is crucial for healthy savory plants:
Savory is relatively drought-tolerant once established, making it suitable for water-wise gardens.
## Growing Tips for Success ### Planting and SpacingHarvest leaves as needed throughout the growing season. For best flavor, pick leaves in the morning after dew has dried. The most intense aroma develops just before flowering.
## Common Growing IssuesWith these simple requirements - standard substrate, sunny to partially shaded location, and moderate watering - you'll enjoy abundant harvests of this flavorful Mediterranean herb throughout the season.
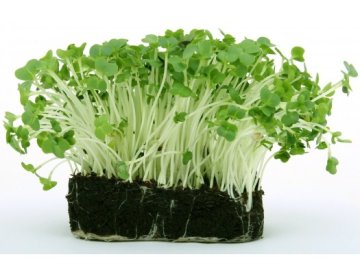
Cress is one of the easiest and fastest-growing herbs you can cultivate in your garden or on your windowsill. This undemanding plant is perfect for beginners and experienced gardeners alike who want to quickly enjoy fresh, vitamin-rich greens. With its peppery taste and high content of vitamins C, A, and minerals, cress is an excellent addition to salads, sandwiches, and many other dishes.
Cress thrives in a sandy substrate that provides good drainage and prevents waterlogging. The soil should be light, airy, and ideally slightly alkaline to neutral (pH 6.0-7.5). If you're growing cress in a pot, use a mixture of universal growing medium with added sand or perlite to improve permeability.
Regarding light requirements, cress is very adaptable - it grows well in both full sun and partial shade. In hot summer months, partial shade is actually preferable as it prevents the plant from bolting too quickly and keeps the leaves tender and juicy. Indoors, place cress on a bright windowsill, ideally facing south or west.
One of the biggest advantages of cress is its minimal water requirements. The substrate should be kept slightly moist but never waterlogged. Overwatering is one of the most common mistakes when growing cress and can lead to root rot and fungal diseases.
Cress can be sown directly into the ground or into containers throughout the growing season. Seeds germinate within 2-3 days, and the first harvest is possible after just 7-14 days. Sow seeds densely on the surface of moist substrate and lightly press them in - don't cover with soil as cress germinates best in light.
For continuous harvest, practice successive sowing - sow a new batch every week. This way you'll always have fresh cress available. Harvest by cutting the young shoots with scissors about 2-3 cm above ground level when they reach a height of 5-8 cm.
Cress is a true vitamin bomb - it contains more vitamin C than citrus fruits and is rich in iron, calcium, and folic acid. Its distinctive peppery flavor adds a fresh note to many dishes:
With its fast growth, minimal requirements, and high nutritional value, cress is the ideal herb for anyone who wants to start growing their own fresh greens. Try successive sowing and enjoy a continuous harvest of fresh, healthy cress throughout the season.
Watercress is an undemanding plant that thrives with minimal care when provided with the right growing conditions. The key to successful cultivation lies in choosing a well-draining substrate, proper placement, and appropriate watering.
Watercress requires a well-draining substrate that prevents water from pooling around the roots. Use a light, sandy soil mix or add perlite and vermiculite to improve drainage. The substrate should be:
Watercress thrives in a sunny location with at least 6 hours of direct sunlight daily. However, it also tolerates partial shade, especially in hot climates where intense afternoon sun might stress the plants. Choose a spot that offers:
Despite its name, watercress grown as a garden herb requires minimal watering. The plant is drought-tolerant once established and prefers drier conditions to constant moisture. Follow these watering guidelines:
For optimal growth and abundant harvests, consider these additional cultivation tips:
By providing a well-draining substrate, positioning your watercress in a sunny location or partial shade, and practicing minimal watering, you'll enjoy healthy, productive plants throughout the growing season.
As summer draws to a close and autumn arrives, your vegetable garden requires special attention. This period is crucial not only for harvesting the fruits of your labor but also for preparing the soil and plants for the coming winter months. Proper autumn care will ensure a bountiful harvest and a healthy garden for the next season.
Autumn is a transitional period when plants slow their growth and prepare for dormancy. For gardeners, this means it's time to harvest late-season vegetables, protect sensitive crops from the first frosts, and prepare the garden for winter. Proper care during this time prevents disease, preserves soil fertility, and ensures your vegetables remain fresh for months to come.
The autumn harvest varies depending on your climate zone and what you've planted, but several vegetables typically reach their peak during this season:
Carrots, parsnips, and beets can withstand light frosts, which actually improve their flavor by converting starches to sugars. Harvest these vegetables before the ground freezes solid. Leave some carrots in the ground with a thick layer of mulch for fresh harvests throughout winter in milder climates.
Potatoes should be harvested when the foliage has died back completely. Choose a dry day and allow the tubers to dry on the soil surface for a few hours before storing. This curing process helps their skins toughen and extends storage life.
Cabbage, Brussels sprouts, and kale are cold-hardy vegetables that actually taste better after exposure to frost. Brussels sprouts can remain on the stalk and be harvested as needed throughout autumn and early winter. Cabbage heads should be cut when they feel firm and solid.
Broccoli and cauliflower should be harvested before hard frosts arrive. Cut the main head of broccoli, and the plant will often produce smaller side shoots for several more weeks.
Onions and garlic planted in late summer may still be growing in autumn. If you planted onions in spring, harvest them when the tops fall over and begin to dry. Cure them in a warm, dry, well-ventilated area for 2-3 weeks before storing.
Leeks are extremely frost-tolerant and can be left in the ground and harvested as needed, even after snow falls.
Winter squash and pumpkins should be harvested before the first hard frost. The skin should be hard enough that you can't pierce it with your fingernail. Leave 2-3 inches of stem attached to prevent rot. Cure them in a warm location (75-85°F/24-29°C) for 10-14 days to harden the skin and improve storage life.
Spinach, lettuce, and arugula planted in late summer will provide fresh salads well into autumn. Many of these greens can tolerate light frosts, especially when protected with row covers or cold frames.
Proper storage techniques can extend the life of your vegetables for months, allowing you to enjoy your harvest well into winter.
Many root vegetables and brassicas prefer cold, humid conditions:
Winter squash, pumpkins, and cured onions prefer these conditions:
Many vegetables freeze well for long-term storage:
Traditional preservation methods work wonderfully for autumn vegetables:
After harvesting, don't neglect the garden itself:
With a little effort, you can continue harvesting fresh vegetables well after the first frost:
Autumn is also the perfect time to plan for next season:
Autumn care of your vegetable garden is a rewarding time that bridges the growing season and winter rest. By harvesting at the right time, storing your vegetables properly, and preparing your garden for the cold months ahead, you'll enjoy the fruits of your labor for months and set the stage for an even better garden next year. The effort you put in now will pay dividends in fresh, nutritious vegetables throughout winter and a thriving garden when spring returns.
Remember, every garden and climate is unique. Pay attention to your local conditions, keep records, and adjust these guidelines to suit your specific situation. Happy harvesting!
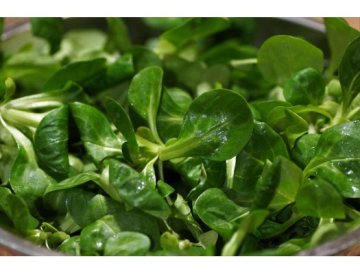
Corn salad (Valerianella locusta), also known as lamb's lettuce or mâche, is an undemanding leafy vegetable that thrives in cooler conditions. It's perfect for autumn and early spring cultivation, offering fresh greens when other vegetables are scarce. With proper soil preparation and care, you can enjoy this nutritious salad throughout the cooler months.
Corn salad prefers moist, well-drained soil with a pH ranging from slightly acidic to alkaline (pH 6.0-7.5). The soil should be:
While corn salad tolerates partial shade, it grows best in a sunny location with at least 4-6 hours of direct sunlight daily. During hot summer months, some afternoon shade can prevent bolting and extend the harvest period.
Corn salad is typically sown directly into the ground from late summer through autumn for winter harvest, or in early spring for spring harvest. The seeds germinate best in cooler temperatures.
Consistent moisture is crucial for tender, flavorful leaves. Water regularly, especially during dry periods, ensuring the soil stays moist but not soggy. Corn salad has shallow roots, so frequent light watering works better than occasional deep soaking.
Corn salad is ready to harvest 6-12 weeks after sowing, depending on the variety and growing conditions. Pick individual leaves or cut entire rosettes just above soil level. The plant may regrow for a second harvest if you leave the roots intact.
With its mild, nutty flavor and impressive cold tolerance, corn salad is an excellent addition to any vegetable garden, providing fresh salads throughout the cooler seasons when grown in moist, slightly acidic to alkaline soil and a sunny location.
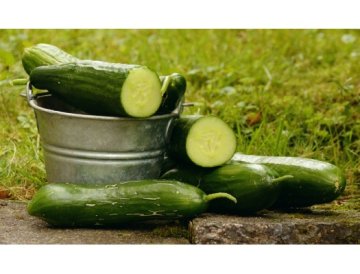
Growing cucumbers - loamy, humus-rich soil, regular watering, sheltered, sunny location
dill growing - sheltered location, moderate watering, moist soil
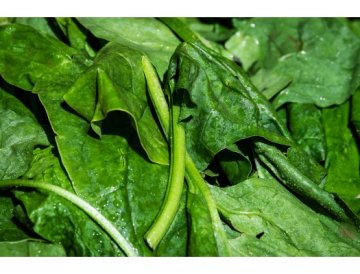
Spinach (Spinacia oleracea) is one of the most popular leafy vegetables valued for its nutritional content and versatility in the kitchen. Successful spinach cultivation requires understanding its specific requirements for soil composition and light conditions.
Spinach thrives in well-drained, humus-rich soil with the following characteristics:
Unlike many vegetables, spinach prefers shaded locations or partial shade, especially during warmer months. Direct sunlight and high temperatures can cause premature bolting (flowering), which reduces leaf quality and makes them bitter.
With proper care and suitable growing conditions, you can enjoy fresh, nutritious spinach from your own garden throughout the growing season.
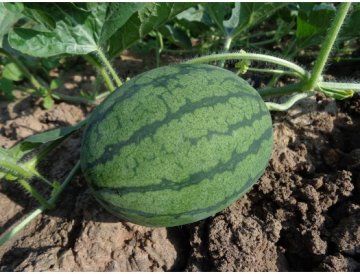
growing melons - sunny location, fertilized, nutrient-rich soil
Growing black salsify - moist, loamy-sandy soil with fertilizer supply (must not be fresh manure), sunny location
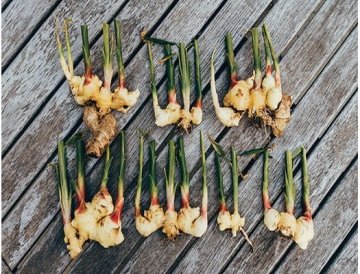
Winter is raging in the garden at full force. But you don't want to slack off and you feel like gardening right now? How about growing your own endless supply of ginger at home? This little exotic wonder not only has universal use in the kitchen, but also proven positive effects on health and warms you up nicely in winter. Don't worry, with tips from Pěstík, you definitely won't mess up your ginger!
Although spring hasn't officially started yet, nature is already slowly but surely embracing the spring weather during the first days of March. However, the long-awaited sunny days also bring spring fatigue. How about chasing away that sleepy mood while waking up your garden from its winter slumber? Pěstík brings you tips on garden activities that are ideal for starting the new gardening season!
While the main sowing season for tomatoes and peppers is long gone, that doesn't mean these vegetables won't need your attention anymore. Now is actually the perfect time to transplant seedlings into open ground and give them proper care. With the right care, you'll enjoy a bountiful harvest!
Is your garden full of weeds and your plants can't defend themselves? Don't let an unwanted jungle overwhelm them. Don't let it ruin your abundant harvest or beautiful lawn. Fight back, take action! We bring you proven tricks on how to deal with weeds, but also how to make use of them.
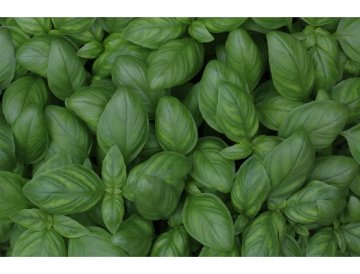
Basil belongs to the Lamiaceae family. Thousands of years ago, basil was already a popular spice in India. From there, its journey led through the Mediterranean to other European countries, where it is now cultivated in numerous species and varieties. Basil is an annual, richly branched herb that grows up to 50 cm tall, depending on location and climate. It has a square stem densely covered with elongated oval leaves, rich in essential oils. If not harvested regularly, whitish or pink inflorescences form on the stem during summer.
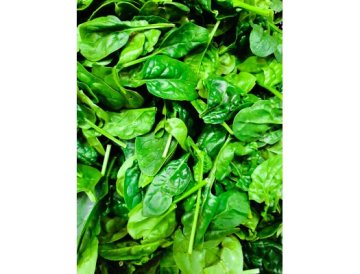
Fresh spinach is a healthy seasonal vegetable with high content of vitamin C and minerals. There are 20 known varieties of spinach in our region.
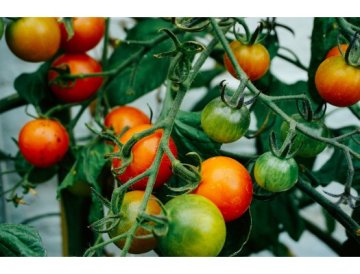
Tomatoes are one of the most popular vegetables grown in home gardens and greenhouses worldwide. Their cultivation is relatively straightforward, but achieving truly delicious, juicy fruits with intense flavor requires knowledge of the right procedures and techniques. In this comprehensive guide, we'll walk you through all stages of tomato growing – from seed selection and sowing, through care during the growing season, to harvest and disease prevention.
The first step to successful tomato growing is selecting the appropriate variety. There are hundreds of tomato varieties differing in size, shape, color, taste, and growing requirements. The basic division is into:
When choosing a variety, consider your climate conditions, available growing space, and intended use of the harvest.
Tomatoes are thermophilic plants that need to be pre-grown as seedlings. Optimal sowing time is 6-8 weeks before the last expected frost, typically from late February to mid-March.
Seeds germinate within 5-10 days. After the first true leaves appear, transplant seedlings into larger pots (at least 10 cm diameter). This process, called pricking out, strengthens the root system and promotes healthy plant growth.
Before transplanting into final positions, seedlings need to be gradually hardened off – acclimatized to outdoor conditions. About 10-14 days before planting out, start placing plants outside for increasingly longer periods, initially in a shaded spot, gradually increasing sun exposure.
Transplant tomatoes into their final position when soil temperature reaches at least 15°C and there's no risk of frost, typically from mid-May onward. Tomatoes thrive in:
Before planting, thoroughly prepare the soil:
Plant tomatoes deeper than they grew in pots – bury stem up to the first true leaves. This promotes formation of additional roots along the buried stem, resulting in stronger, more resilient plants. Spacing between plants should be:
Tomatoes require regular and consistent watering. Irregular watering leads to fruit cracking and blossom-end rot. Follow these rules:
Average water requirement is 2-3 liters per plant every 2-3 days, depending on weather and soil type.
Tomatoes are demanding plants requiring regular nutrient supply:
Quality organic fertilizers include BioBizz Bio-Grow and Bio-Bloom, or Plagron products, which provide balanced nutrition throughout the growing cycle.
Indeterminate tomato varieties require sturdy support:
Tie plants to supports regularly using soft materials that won't damage stems.
Side shoot removal (removing lateral shoots growing from leaf axils) is key to successful indeterminate tomato growing:
Determinate varieties generally don't require side shoot removal as they naturally produce compact bushes.
In late summer (late July to early August), top indeterminate varieties – remove the growing tip above 5th-7th fruit truss. This ensures remaining fruits have time to ripen before season's end.
Late blight (Phytophthora infestans) – the most serious tomato disease:
Blossom-end rot – physiological disorder caused by calcium deficiency:
Powdery mildew – white coating on leaves:
Tomatoes are ready for harvest when they achieve full color characteristic of their variety and are slightly soft to touch. For best flavor, let fruits fully ripen on the plant. Harvest:
Greenhouse cultivation offers several advantages:
Tomatoes can be successfully grown in pots and containers on balconies and terraces:
Growing tomatoes is rewarding and with proper care provides abundant harvest of delicious, healthy fruits. Key to success is choosing suitable varieties, providing optimal growing conditions, regular care and prevention of diseases and pests. Whether growing in garden, greenhouse or containers, following these basic principles will help you achieve excellent results. Nothing compares to the taste of sun-ripened, homegrown tomatoes – it's worth the effort!
Remember that every garden and every season is different. Don't be discouraged by initial failures – they're part of the learning process. With experience, you'll discover what works best in your specific conditions, and your tomato harvests will improve year after year.
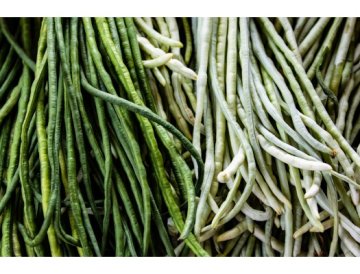
Beans are a legume scorned by many and loved by just as many. If you've returned from a long stay in England and can't even look at beans in tomato sauce because you've eaten them almost every day with nearly everything, don't give in to skepticism. Well-prepared beans from your own garden have a completely different taste that's definitely worth trying. Don't be afraid of growing beans - it's quite simple and the results will certainly surprise you pleasantly.
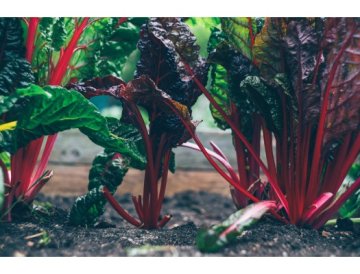
Chard is not only very healthy, but also creates a highly decorative impression in the garden...
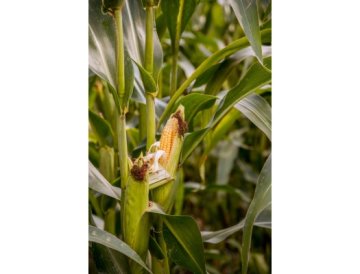
You no longer have to buy your favorite boiled corn only at fairs - you can grow it yourself.

Looking for a natural way to boost your vitality and performance? Tribulus terrestris, also known as puncture vine or goat's head, might be exactly what you need. This ancient medicinal plant has been used for centuries in traditional medicine, and today you can easily grow it at home.
Tribulus terrestris is an annual plant from the Zygophyllaceae family that naturally grows in warm and temperate regions around the world. It's known for its spiky fruits and yellow flowers, but most importantly for its remarkable medicinal properties.
Growing tribulus terrestris is surprisingly easy, and you don't need to be an experienced gardener. The plant is undemanding and thrives even in poorer soil conditions.
The aerial parts of the plant are harvested during flowering, which typically occurs 2-3 months after sowing. The fruits are harvested when fully ripe. Dry the harvested plant material in a shaded, well-ventilated area.
Growing tribulus terrestris at home has many advantages:
Although tribulus terrestris is a natural plant, it's important to approach its use responsibly:
Tribulus terrestris is a proven natural alternative that can help improve male potency and overall vitality. Growing this plant at home is easy, economical, and gives you full control over the quality of the final product. Why pay for expensive supplements when you can have your own natural source of vitality right in your garden?
Start growing today and discover the power of nature!

Berries are delicious and packed with vitamins at the same time. Growing them isn't demanding and they can be used in various ways. Read here about different types and how to grow them...
Stevia is used as a sweetener. Unlike sugar, it is virtually calorie-free and can be used by diabetics.
Today we'll introduce you to unconventional, centuries-old heirloom vegetable varieties, just as our ancestors remembered them. Read more...
Heirloom vegetables are traditional plant varieties that have been passed down through generations without modern crossbreeding or genetic modification. These varieties have remained unchanged for decades or even centuries, preserving their original characteristics, flavors, and growing habits.
Unlike modern hybrid vegetables bred primarily for uniform appearance, long shelf life, and disease resistance, heirloom vegetables offer authentic, intense flavors that many people find far superior to their commercial counterparts. The taste profiles are often more complex, with stronger aromatic qualities and genuine vegetable character.
Heirloom tomatoes are perhaps the most celebrated among traditional varieties, offering an incredible range of colors, shapes, sizes, and flavors – from sweet and fruity to rich and savory.
Beyond the standard orange, heirloom carrots come in purple, white, yellow, and red varieties, each with its own distinct flavor profile and nutritional benefits.
Traditional lettuce varieties offer robust textures and flavors that stand up well in salads and cooking, unlike many modern varieties bred for mild taste.
Heirloom legumes provide exceptional flavor and often have interesting historical stories attached to their cultivation and preservation.
Cultivating heirloom varieties in your garden connects you directly with agricultural heritage while producing exceptionally flavorful vegetables for your table.
Specialty seed companies and seed exchanges offer extensive collections of heirloom varieties. Look for reputable suppliers who specialize in open-pollinated, non-GMO seeds and provide detailed variety histories.
As more gardeners and consumers discover the remarkable flavors and benefits of heirloom vegetables, these traditional varieties are experiencing a well-deserved revival. By growing and enjoying heirlooms, you're not just experiencing superior taste – you're actively participating in preserving important genetic diversity and cultural heritage for future generations.
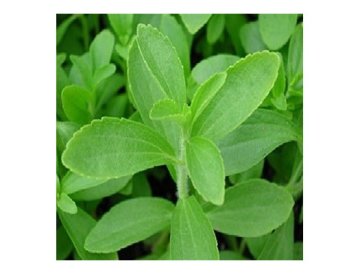
Stevia is a plant native to South America that's 300 times sweeter than sugar and contains zero calories! Simply grow it on your windowsill and sweeten your life the healthy way.
Looking for a healthy alternative to sugar? Stevia is nature's answer to your sweet cravings. This remarkable plant has been used for centuries in South America and is now gaining popularity worldwide as a natural, calorie-free sweetener.
Growing stevia at home is surprisingly simple. This compact plant thrives on sunny windowsills and requires minimal care. Simply pick fresh leaves whenever you need a natural sweetener for your tea, coffee, or baking.

Whether you prefer mild warmth or fiery heat, growing your own chilli peppers ensures you'll always have fresh pods ready to pick - right from your windowsill or garden bed. Discover how to cultivate these flavourful treasures and bring authentic heat to your kitchen year-round.
Home-grown chilli peppers offer unmatched freshness and flavour that shop-bought varieties simply can't match. You'll have complete control over cultivation methods, can choose from hundreds of varieties, and enjoy the satisfaction of harvesting your own spicy bounty. Plus, chilli plants are surprisingly easy to grow - even for beginners.
The world of chillies offers incredible diversity:
Chilli peppers thrive in warm, sunny conditions. They need at least 6-8 hours of direct sunlight daily, whether grown on a sunny windowsill, balcony, or in the garden. Indoor cultivation works brilliantly year-round, whilst outdoor growing suits the warmer months.
Chillies prefer temperatures between 20-30°C. They'll tolerate slightly cooler conditions but growth slows considerably below 15°C. For indoor growing, maintain consistent warmth and avoid cold draughts near windows.
Start seeds indoors 8-10 weeks before the last frost, or purchase young plants for quicker results. Use well-draining, nutrient-rich growing medium with a pH between 6.0-6.8. Chillies grow excellently in containers - choose pots at least 5 litres in size for standard varieties, or 10+ litres for larger plants.
Feed your chilli plants with a balanced fertiliser during early growth, then switch to a formula higher in potassium and phosphorus once flowering begins. This encourages abundant fruit production. Organic options work wonderfully and enhance flavour development.
Water consistently but avoid waterlogging - chillies dislike "wet feet". Allow the top 2-3cm of soil to dry between waterings. Consistent moisture levels prevent blossom end rot and ensure even fruit development. Reduce watering slightly as fruits ripen to intensify flavour and heat.
Taller varieties benefit from staking to support heavy fruit loads. Pinch out the growing tip when plants reach 30cm to encourage bushier growth. Remove lower leaves to improve air circulation and prevent fungal issues.
Most chillies can be picked green or left to ripen to their final colour - red, yellow, orange, or even purple. Ripe peppers generally offer fuller flavour and maximum heat. Use sharp scissors or secateurs to avoid damaging plants. Regular harvesting encourages continued production.
Dry excess chillies by hanging in a warm, airy location, or freeze them whole for later use. Make your own chilli flakes, powder, or infused oils to enjoy your harvest year-round.
With proper indoor conditions, chilli plants can produce for several years. Overwinter them by reducing watering, moving to a bright location, and maintaining temperatures above 10°C. Prune back in early spring to encourage fresh, productive growth.
Growing chilli peppers combines practicality with pleasure - you'll enjoy beautiful plants, fascinating cultivation, and a constant supply of fresh, flavourful heat. Whether you're adding subtle warmth to family meals or pushing the boundaries with superhot varieties, home-grown chillies deliver unbeatable satisfaction.
Ready to turn up the heat? Start with a variety suited to your taste, provide plenty of light and warmth, and you'll soon be harvesting your own delicious, fiery peppers!
A sunny location is most suitable for savory; we place it in pots, planters and bowls on the balcony, in pots in front of windows, and on the windowsill in winter.
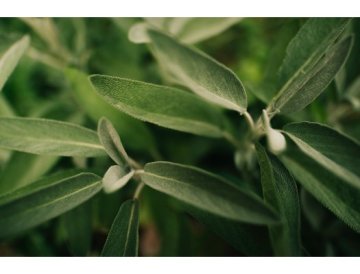
We grow rosemary mainly for its leaves, which are harvested at their peak maturity and potency from June to August. The harvested leaves are then dried in the shade and subsequently stored in sealable jars. Rosemary came to Europe across the Alps into monastery gardens, where it was already cultivated at that time as both an ornamental and medicinal plant.
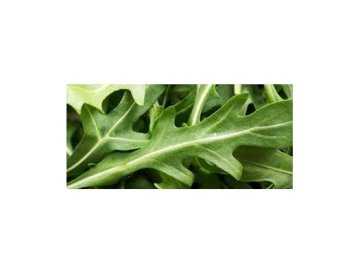
Arugula - a leafy vegetable on the rise - is an easy-to-grow brassica that originates from the Mediterranean. It is rich in vitamins. Due to its distinctive flavor, it is mainly used in gastronomy.
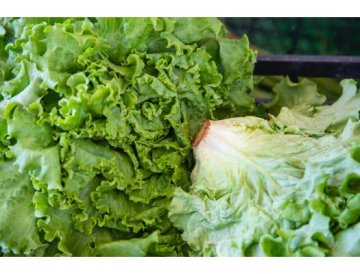
Lettuce is the most widespread and popular vegetable in Czech gardens. It's easy to grow, looks beautiful in the garden bed, and can be used to create countless dishes.
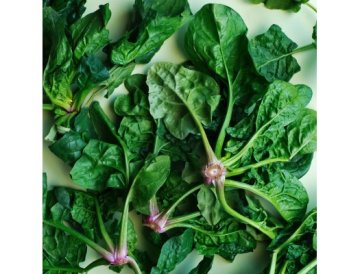
Spinach is a leafy vegetable full of vitamins.
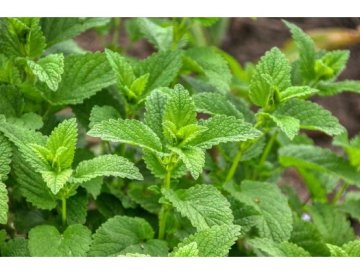
There are over 600 species of mint!

Broccoli is not as commonly grown in garden beds, particularly in Czech gardens. However, it is an abundant source of vitamins and beneficial nutrients. It is very tasty and you will be satisfied with the harvest even after the first picking.
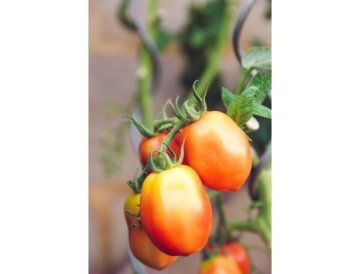
The tomato is a fruiting vegetable represented by a large number of varieties that differ from each other in color, taste, and shape, and which are united by the fact that they are a very tasty and diverse vegetable loved by both children and adults.

The pumpkin is one of the oldest cultivated crops. It's a symbol of autumn. We grow it not only for consumption, but also for its decorative value.
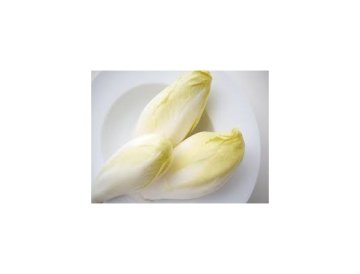
Are you looking for something new to grow in your garden? Chicory is an excellent choice for those who want to try cultivating an unconventional vegetable. This plant will reward you with delicious chicons (chicory hearts) that will bring a unique, slightly bitter taste and plenty of vitamins to your kitchen.
Chicory (Cichorium intybus var. foliosum) is a biennial plant belonging to the Asteraceae family. While the common chicory is known as a wildflower with blue flowers, cultivated varieties are grown specifically for their edible chicons - compact, elongated heads with light yellow-white leaves.
Chicory offers several advantages that make it an interesting choice for home gardeners:
Growing chicory is a two-stage process that requires patience but isn't difficult.
Sowing:
Care:
Root preparation:
Forcing:
Chicons are ready to harvest when they reach 12-15 cm in length and are firm to the touch. Cut them just above the root - sometimes a second, smaller harvest can grow from the same root.
Storage:
The slightly bitter taste of chicory makes it a unique ingredient for various dishes:
Regular consumption of chicory brings numerous health benefits:
Chicory is an unconventional but rewarding vegetable that deserves a place in your garden. Although it requires a bit more effort and patience than common vegetables, the result is worth it. Fresh, homegrown chicons will bring a unique taste to your kitchen and enrich your diet with important nutrients. Try growing chicory this year and discover a new culinary dimension!
Lovage - one plant per family is enough. The flavoring of soups, especially vegetable broths, will delight you. It's like having your own natural seasoning that you can pick fresh from your garden whenever you need it.
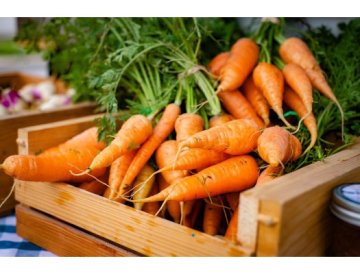
Carrot season brings an abundance of this nutritious vegetable, and proper storage and preparation ensure you can enjoy fresh, vitamin-rich carrots for months to come. Whether you've grown your own or stocked up from the market, here's how to preserve the quality and nutritional value of your carrot harvest.
Root cellar storage remains one of the best traditional methods for keeping carrots fresh. Store them in boxes filled with slightly damp sand, keeping them separated to prevent rot from spreading. The ideal temperature is between 0-4°C with high humidity.
Refrigerator storage works well for smaller quantities. Remove the green tops, place carrots in perforated plastic bags, and store them in the vegetable drawer where they'll stay crisp for several weeks.
Carrots are packed with beta-carotene, vitamins, and minerals. To maximize vitamin retention:
Fresh consumption offers the most nutrients. Add grated carrots to salads, make fresh carrot juice, or enjoy them as healthy snacks with dips.
Freezing carrots is simple and effective. Blanch sliced or diced carrots for 2-3 minutes, cool immediately in ice water, drain well, and freeze in portion-sized bags.
Fermentation creates probiotic-rich foods. Fermented carrots make an excellent side dish and retain beneficial nutrients while developing complex flavors.
Transform your abundant harvest into various dishes:
With proper storage and creative preparation methods, your carrot harvest will provide fresh vegetables and essential vitamins throughout the winter months. Enjoy the fruits of your gardening labor!
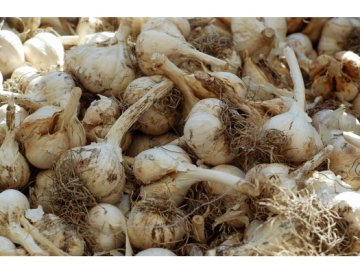
Garlic - Allium sativum L.
Garlic (Allium sativum L.) is one of the oldest cultivated plants in human history. This perennial bulbous plant from the Amaryllidaceae family originates from Central Asia, specifically from the regions of today's Uzbekistan, Turkmenistan, and Tajikistan. From there, it spread throughout the world and became an irreplaceable part of cuisine and traditional medicine in virtually all cultures.
The plant reaches a height of 30-120 cm and forms an underground bulb composed of individual segments - cloves. Each bulb typically contains 4-20 cloves wrapped in a papery white or pink skin. The leaves are narrow, flat, and gray-green in color. Garlic blooms in summer, producing spherical inflorescences with small white or pinkish flowers, although many cultivated varieties don't bloom or produce sterile flowers.
Garlic is a relatively undemanding plant that thrives in temperate climates. For successful cultivation, it's important to follow a few basic principles:
Garlic prefers sunny locations with well-drained, light to medium-heavy soil rich in humus. The ideal pH ranges from 6.0 to 7.5. Heavy clay soils should be lightened with sand or compost. The location should not be waterlogged, as the bulbs could rot.
There are two main planting periods:
Individual cloves are planted 5-7 cm deep with spacing of 10-15 cm in rows 20-30 cm apart. Plant them with the pointed end facing up.
Garlic requires regular weeding, especially in the early stages of growth. Watering should be moderate - more intensive during the formation of bulbs (May-June), reduced before harvest. During the growing season, you can apply organic fertilizers with a higher nitrogen content in spring, and later potassium fertilizers to support bulb development.
An important step is removing flower stems (scapes), which should be cut off as they appear. This will direct the plant's energy toward bulb formation rather than seed production.
Garlic is typically harvested in July-August when the leaves start yellowing and drying (about 2/3 of the leaves). Pull the bulbs in dry weather and let them dry in an airy, shaded place for 2-3 weeks. After drying, clean the roots and shorten the stems, or braid them into traditional garlic braids.
Store garlic in a cool (0-4°C), dry place with good air circulation. Under proper conditions, it can be stored for 6-8 months.
Garlic is a nutritional treasure. 100 g of fresh garlic contains:
But the real value of garlic lies in its active substances:
Allicin is the main active substance responsible for the characteristic smell and taste of garlic, as well as many of its health effects. It's formed when garlic is mechanically damaged (cutting, crushing) from the precursor alliin through the enzyme alliinase. Allicin has strong antimicrobial, antifungal, and antiviral properties.
Other important sulfur compounds include ajoene, diallyl disulfide, and S-allylcysteine, which contribute to cardiovascular support and antioxidant activity.
Garlic is an excellent source of:
Garlic has been used in traditional medicine for millennia, and modern science confirms many of its beneficial effects:
Regular consumption of garlic can help lower blood pressure, especially in people with hypertension. It also helps reduce LDL cholesterol levels and increases HDL cholesterol. The sulfur compounds in garlic support vessel elasticity and may prevent atherosclerosis.
Garlic is known for its antimicrobial effects against bacteria, viruses, and fungi. Regular consumption can reduce the frequency and duration of colds. Allicin and other sulfur compounds support the activity of immune cells.
Garlic contains numerous antioxidants that protect cells from damage by free radicals. This may help prevent chronic diseases and slow aging processes.
Garlic supports healthy intestinal microflora and has prebiotic effects. It aids digestion and can help with digestive issues.
Some studies suggest that regular garlic consumption may reduce the risk of certain types of cancer, especially of the digestive tract. However, more research is needed for definitive confirmation.
Garlic is one of the most used seasonings in world cuisine. It can be used:
The flavor intensity of garlic depends on preparation - raw garlic has the most intense flavor and highest allicin content, while prolonged cooking softens its flavor and reduces the content of active substances.
Although garlic is generally safe, excessive consumption can cause some issues:
Pregnant and breastfeeding women can consume garlic in normal culinary amounts, but should avoid higher doses in the form of supplements.
Garlic is an exceptional plant that combines culinary and medicinal properties. Its cultivation is simple and rewarding, making it accessible to every gardener. Regular consumption in reasonable amounts can contribute to overall health and well-being. Whether you grow your own garlic or buy it, it deserves its place in your healthy diet.
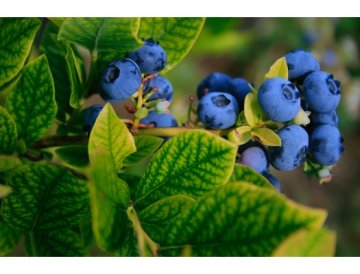
Blueberries are popular fruit bushes that reward growers with delicious and healthy berries. However, successful cultivation requires meeting their specific requirements - particularly regarding soil pH and moisture.
The most important condition for growing blueberries is acidic soil with pH 4.5-5.5. In alkaline or neutral soils, plants suffer from chlorosis and fail to thrive. Use specialized substrates for acid-loving plants or prepare a mixture of:
The substrate must be well-draining yet moisture-retentive. Waterlogging damages roots, while excessive drying stresses the plant.
Blueberries prefer sunny to partially shaded locations. In full sun, they produce larger and sweeter berries, though they also tolerate light shade. Protect them from strong winds that dry out soil and damage branches.
Blueberries have shallow root systems and require consistently moist soil. Water regularly, especially during fruit development and hot weather. Use soft water or rainwater - hard tap water increases soil pH. Mulching with pine bark or needles helps retain moisture and maintain acidity.
With proper care, blueberries will reward you with abundant harvests of tasty fruit for many years.

Caraway (Carum carvi) is a traditional herb known for its aromatic seeds used in cooking and natural medicine. Successful cultivation requires understanding its specific growing requirements and providing optimal conditions.
Caraway thrives in humus-rich soil with good structure. The substrate should be:
Choose a sunny location where caraway receives at least 6-8 hours of direct sunlight daily. Full sun exposure promotes:
Caraway requires moderate watering with careful attention to moisture levels:
For successful caraway cultivation:
With proper care, humus-rich alkaline soil, plenty of sunshine, and restrained watering, your caraway plants will produce aromatic, high-quality seeds perfect for culinary and medicinal use.
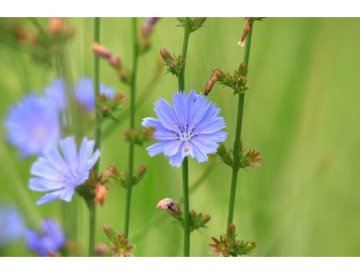
Chicory thrives best in nutrient-rich, well-drained soil with a neutral to slightly alkaline pH (6.5-7.5). The substrate should be loose and airy to allow the deep taproot to develop freely. Before planting, work well-rotted compost or aged manure into the soil to ensure sufficient nutrients throughout the growing season.
For container cultivation, use quality potting soil mixed with perlite or sand for better drainage. The container should be at least 30 cm deep to accommodate the taproot. Avoid heavy, clay soils that retain too much moisture and could cause root rot.
## Light Requirements - Exclusively Sunny LocationChicory is a sun-loving plant that requires full sun for at least 6-8 hours daily. The sunnier the location, the better the leaves develop and the higher the yield. Insufficient light leads to weak, pale leaves and reduced plant vitality.
Choose a sheltered spot protected from strong winds, which can damage the leaves. Southern or southwestern exposure is ideal. In partial shade, chicory grows more slowly and produces less robust heads.
## Watering - Moderate but RegularChicory needs moderate watering - the soil should be evenly moist but never waterlogged. Water regularly, especially during dry periods and the initial growth phase. Once established, chicory is relatively drought-tolerant thanks to its deep root system.
Water preferably in the morning directly at the base of the plant, avoiding wetting the leaves to prevent fungal diseases. In summer heat, increase watering frequency but always check soil moisture first. Overwatering is more harmful than occasional drying out.
## Additional Care TipsWith proper care and the right growing conditions, you'll enjoy a bountiful harvest of fresh, crunchy chicory leaves perfect for salads and cooking.
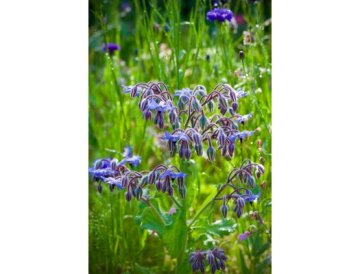
Borage (Borago officinalis) is an undemanding annual herb that thrives in garden conditions with minimal care. Success in growing this beneficial plant depends on meeting several basic requirements that reflect its Mediterranean origin.
Borage prefers alkaline to neutral soil with a pH between 6.5 and 8.0. The substrate must be well-draining to prevent root rot, which is the most common problem when growing this plant. Heavy clay soils should be improved with sand or perlite to increase their permeability.
The ideal substrate composition includes:
Borage requires an exclusively sunny position with at least 6-8 hours of direct sunlight daily. In shaded conditions, the plant grows elongated, produces fewer flowers, and is more susceptible to fungal diseases. Full sun ensures:
Moderate watering is key to successful borage cultivation. The plant is relatively drought-tolerant once established and prefers drier conditions to constant moisture. Overwatering leads to root rot and reduced vitality.
Watering principles:
Borage is an excellent companion plant in the vegetable garden, attracting pollinators and improving soil structure with its deep roots. The plant readily self-seeds, so it will return year after year if you allow some flowers to set seed.
Regular harvesting of young leaves and flowers encourages continued production and extends the harvest period. Borage typically reaches a height of 60-90 cm and spreads approximately 45-60 cm wide.
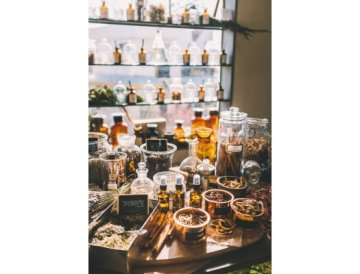
Herbs and medicinal plants have found their application in treating many ailments, even alongside highly technologized and conservative medicine. The use of medicinal plants encourages the human body to mobilize its own natural defense mechanisms, enabling it to fight off illness on its own.
Medicinal herbs have been used for centuries as a natural way to support health and wellness. Their therapeutic properties stem from the active compounds found in various parts of the plants - leaves, flowers, roots, seeds, and bark. Understanding how to properly harvest, dry, and store herbs is essential to preserve their healing qualities and maximize their effectiveness.
The potency of medicinal herbs depends greatly on when and how they are harvested. Different plant parts should be collected at specific times to ensure optimal concentration of active ingredients. Proper drying techniques help maintain the herbs' beneficial properties while preventing mold and degradation.
Herbs can be processed into various forms depending on their intended use:
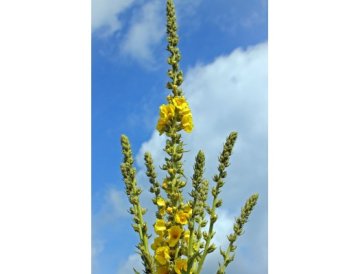
Verbascum, commonly known as mullein, is an impressive ornamental plant that thrives in sunny locations with minimal care requirements. These drought-resistant perennials are perfect for rock gardens, gravel beds, and natural gardens where they create dramatic vertical accents with their tall flowering spikes.
The key to successful mullein cultivation lies in providing a well-drained, rocky substrate. Verbascum naturally grows in poor, sandy, or stony soils and doesn't tolerate waterlogged conditions. The ideal substrate should contain:
For container growing, mix standard potting soil with at least 50% coarse sand, perlite, or fine gravel. A layer of gravel at the pot bottom ensures proper drainage.
Full sun exposure is absolutely essential for healthy verbascum growth and abundant flowering. These plants require:
In insufficient light, mullein plants become leggy, produce fewer flowers, and are more susceptible to diseases. Partial shade significantly reduces their ornamental value and flowering performance.
Verbascum is highly drought-tolerant once established and requires only moderate watering:
Overwatering is the most common mistake in mullein care. Constantly moist soil leads to root rot and fungal diseases. These plants naturally store water in their thick, felted leaves and can survive extended dry spells.
For optimal results with verbascum cultivation, consider these practical recommendations:
By providing well-drained rocky substrate, full sun exposure, and moderate watering, you'll enjoy impressive mullein plants that require minimal maintenance while creating stunning architectural features in your garden throughout the growing season.
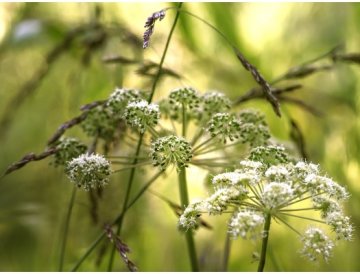
Angelica (Angelica archangelica) is an impressive biennial plant that can reach heights of up to 2 meters. This aromatic herb has been valued for centuries for its medicinal properties and distinctive flavor. Growing angelica in your garden requires understanding its specific needs for substrate, light, and water.
The key to successful angelica cultivation lies in choosing the right growing medium. Angelica thrives in well-draining substrate that prevents waterlogging while maintaining adequate moisture levels.
Unlike many garden herbs that prefer full sun, angelica grows best in partial shade. This makes it an excellent choice for those challenging shady spots in your garden.
Angelica is a moisture-loving plant that requires generous watering throughout the growing season. Consistent moisture is crucial for healthy growth and preventing premature flowering.
Premature bolting: Stress from drought or excessive heat can cause early flowering. Maintain consistent moisture and provide adequate shade.
Poor germination: Angelica seeds require fresh seed for successful germination. Store seeds properly or purchase new seeds annually.
Root rot: Despite loving moisture, angelica needs well-draining soil. Ensure proper drainage to prevent fungal issues.
By providing angelica with well-draining substrate, partial shade, and generous watering, you'll be rewarded with a magnificent herb that adds both beauty and utility to your garden. This impressive plant not only serves culinary and medicinal purposes but also creates a stunning architectural presence in partially shaded areas.
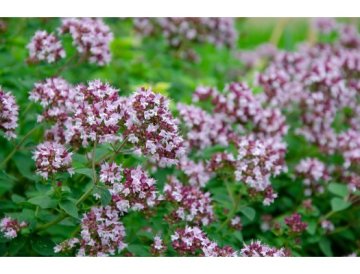
Oregano (Origanum vulgare) is one of the most popular culinary herbs that will enrich any garden or balcony. This unpretentious Mediterranean plant is known for its aromatic leaves full of essential oils, which are indispensable in the kitchen. Growing oregano is simple and doesn't require much effort – it thrives in a sunny location, prefers light substrate, and tolerates drought well. Whether you're an experienced gardener or a beginner, oregano will reward you with a rich harvest and pleasant scent.
Oregano is a perennial herb from the mint family (Lamiaceae) that originally comes from the Mediterranean region and Western Asia. It grows to a height of 30-60 cm and creates bushy growth with small oval leaves. In summer, it blooms with delicate pink to purple flowers that attract beneficial insects.
The plant is popular for its strong aroma and slightly bitter, spicy taste. Oregano contains essential oils, antioxidants, and other bioactive substances that not only enrich the taste of dishes but also have potential health benefits.
The key to successful oregano cultivation is light and well-draining substrate. Oregano naturally grows in rocky and sandy soils of the Mediterranean, so it's important to provide it with similar conditions.
Avoid heavy clay substrates that retain water – oregano doesn't tolerate waterlogging, which can lead to root rot. If planting directly in the garden, you can improve heavy soil by adding sand, compost, or perlite.
Oregano thrives best in a sunny location, but can also handle partial shade. The more sun it receives, the more intense will be the aroma of its leaves.
Oregano is also ideal for growing on a balcony or terrace, where you can place it in pots or planters. Just ensure adequate drainage and sufficient light.
One of the biggest advantages of oregano is its low water requirement. This plant is adapted to dry conditions and tolerates drought much better than excess moisture.
Young plants need slightly more water for establishment, but even then it's important not to overdo it. Mature oregano plants can survive short periods without water without harm.
Oregano can be grown from seeds, cuttings, or by dividing established clumps. Each method has its advantages.
Oregano is an unpretentious plant, but basic care throughout the year will ensure healthy growth and rich harvest.
Oregano has minimal nutrient requirements. Over-fertilization can even reduce the intensity of its aroma.
Regular pruning not only supports plant health, but also increases leaf production.
Fresh oregano can be used immediately in the kitchen, or you can dry it for later use. Hang shoots in an airy, shaded place until completely dry, then store the leaves in an airtight container.
Oregano is a robust plant, but sometimes problems can arise.
Oregano is an irreplaceable ingredient in Italian, Greek, and other Mediterranean cuisines. It's perfect for:
Beyond the kitchen, oregano is valued for its antimicrobial and antioxidant effects. It can be used in herbal teas or as an ingredient in natural cosmetics.
Growing oregano is ideal for anyone looking for an unpretentious herb that provides excellent results with minimal care. Light substrate, sunny location or partial shade, and minimal watering are the keys to success. Whether you grow oregano in the garden, on the balcony, or windowsill, this aromatic plant will reward you with a rich harvest of flavorful leaves throughout the entire season. Start growing oregano today and enjoy the fresh taste of the Mediterranean right at home!
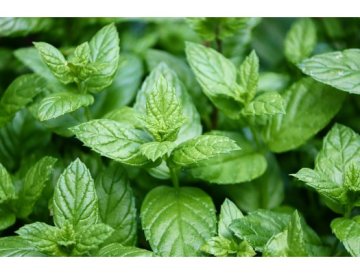
Mint is a popular aromatic herb that is easy to grow and requires minimal care. To achieve successful cultivation, it's important to know a few basic principles about its requirements.
Mint thrives best in humus-rich substrate with good drainage. The soil should be nutrient-rich and slightly acidic to neutral (pH 6.0-7.0). You can use universal potting soil enriched with compost or vermicompost. If you're growing mint in a container, ensure there are drainage holes in the bottom to prevent waterlogging.
Although mint can tolerate partial shade, it grows best in a sunny location where it receives at least 4-6 hours of direct sunlight daily. With sufficient light, the plant produces more essential oils, making it more aromatic. However, in extremely hot climates, light afternoon shade is beneficial to prevent the leaves from burning.
Mint requires moderate watering - the substrate should be consistently moist but not waterlogged. Water regularly, especially during hot and dry weather, but allow the top layer of soil to dry slightly between waterings. Overwatering can lead to root rot, while lack of water causes the leaves to wilt and lose their aroma.
With the right conditions - humus-rich substrate, sunny location, and moderate watering - your mint will thrive and provide you with fresh aromatic leaves throughout the season.
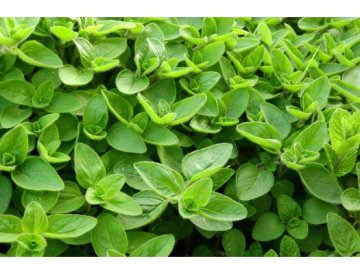
Marjoram (Origanum majorana) is a popular Mediterranean herb valued for its aromatic leaves and culinary uses. Successful cultivation requires understanding its specific growing requirements, particularly regarding soil composition, light exposure, and watering habits.
Marjoram thrives in well-drained, sandy soil with an alkaline to neutral pH between 6.5 and 7.5. The plant's Mediterranean origins make it naturally adapted to poor, rocky soils with excellent drainage. Heavy clay soils should be amended with sand, perlite, or vermiculite to improve drainage and prevent root rot.
Key substrate characteristics for optimal growth:
For container growing, use a specialized Mediterranean herb substrate or create your own mix with equal parts potting soil, coarse sand, and perlite. Add a handful of lime or crushed eggshells to maintain alkalinity.
Marjoram requires full sun exposure with at least 6-8 hours of direct sunlight daily. Insufficient light leads to leggy growth, reduced essential oil production, and diminished flavor intensity. Position plants in the sunniest spot available, whether in gardens or containers.
Benefits of proper sun exposure:
In extremely hot climates with temperatures regularly exceeding 35°C (95°F), afternoon shade may prevent leaf scorch while maintaining overall growth vigor.
One of marjoram's greatest advantages is its drought tolerance and minimal water needs. Overwatering is the most common cause of cultivation failure, leading to root rot and fungal infections.
Proper watering guidelines:
Established plants demonstrate remarkable drought resistance and can survive extended dry periods. In fact, mild water stress often intensifies the concentration of aromatic compounds in the leaves.
Temperature: Marjoram prefers warm conditions between 20-25°C (68-77°F) and is sensitive to frost. Treat as an annual in cold climates or protect during winter months.
Fertilization: Minimal feeding is required. Apply diluted organic liquid fertilizer once monthly during active growth, or incorporate slow-release organic matter at planting.
Harvesting: Regular harvesting encourages bushier growth. Cut stems above leaf nodes in the morning after dew has dried but before intense midday heat.
Pruning: Trim regularly to maintain compact shape and prevent flowering if foliage production is the goal. However, flowers are also edible and attract beneficial pollinators.
Root rot: Usually caused by overwatering or poor drainage. Improve soil drainage and reduce watering frequency.
Leggy growth: Result of insufficient sunlight. Relocate to sunnier position and prune to encourage bushier habit.
Yellowing leaves: May indicate either waterlogging or, less commonly, nutrient deficiency. Check soil moisture and drainage first.
Pest resistance: Marjoram's aromatic oils naturally repel most pests, though aphids may occasionally appear. Remove by hand or spray with water.
By providing sandy alkaline soil, abundant sunshine, and restrained watering, you'll cultivate healthy, aromatic marjoram plants that deliver exceptional flavor for culinary applications while requiring minimal maintenance.

Chives (Allium schoenoprasum) are one of the most popular herbs in European cuisine and among the easiest plants to grow at home. Whether you're a beginner or an experienced gardener, this aromatic herb will reward you with a harvest throughout most of the year. In this comprehensive guide, you'll learn everything about growing chives – from selecting the right substrate and location to proper watering and harvesting.
Chives are an exceptionally undemanding herb that thrives in most garden conditions. The key to success lies in understanding its basic needs:
One of the biggest advantages of chives is that they don't require any special substrate. A standard universal potting mix with good drainage properties is perfectly sufficient.
The optimal substrate for chives should have these characteristics:
You can use ready-made universal substrates or prepare your own mix from garden soil, compost, and sand in a 2:1:1 ratio. For container growing, it's advisable to add perlite or vermiculite for better aeration.
If you're growing chives in pots or containers, choose a substrate with these properties:
Chives are flexible regarding light requirements and thrive in both full sun and partial shade. This makes them ideal for various locations in the garden or on the balcony.
In a sunny spot (6-8 hours of direct sunlight daily), chives develop:
The sunny location is ideal if you want maximum harvest and the most aromatic chives for the kitchen.
In partial shade (4-6 hours of light daily), chives also grow well, though with some differences:
Partial shade is suitable if you have limited space or want to use a spot under trees or on a north-facing balcony.
Watering is a key factor for successful chive cultivation. While chives aren't excessively demanding, they require regular moderate watering to maintain optimal growth.
Overwatering:
Underwatering:
Spring and Summer: Water more frequently, especially during hot and dry periods. Check soil moisture regularly – the substrate should be moist but not waterlogged.
Autumn and Winter: Reduce watering frequency. Chives go dormant, especially if grown outdoors. Water only when the substrate is visibly dry.
Chives can be grown from seed or purchased as young plants. Both methods have their advantages.
If you don't want to wait for seed germination, purchase ready-made young plants and plant them directly in the garden or containers. This method allows for a faster harvest.
Chives are undemanding on nutrients, but regular fertilizing supports healthy growth and abundant harvest.
Avoid over-fertilizing, which can lead to excessive growth at the expense of flavor.
Chives can be harvested continuously throughout the growing season. Proper harvesting supports new growth and extends the harvest period.
Fresh chives are best used immediately after harvest. If you want to preserve them for later, try these methods:
Chives are relatively resistant to pests and diseases, but sometimes problems can occur.
Prevention is key – ensure good air circulation, avoid waterlogging, and remove affected parts of the plant.
Chives are a hardy perennial that can overwinter outdoors without problems. In colder regions, it's advisable to mulch the plants with straw or leaves.
If you grow chives in pots, you can either:
Growing chives brings numerous benefits:
Growing chives is simple, undemanding, and rewarding. Whether you have a large garden or just a small pot on the balcony, this aromatic herb will provide you with a fresh harvest with minimal care. Standard substrate, sunny location or partial shade, and moderate watering – that's all chives need to thrive and reward you with delicious stems throughout the season.
Try growing chives and discover how easy it is to have fresh herbs on hand year-round!
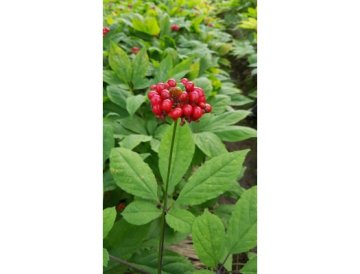
Ginseng (Panax ginseng) is one of the most valued medicinal plants in the world, known for its adaptogenic effects and health benefits. While it's a demanding crop requiring patience and specific conditions, home cultivation is entirely possible with the right approach. This guide will take you through all the key aspects of successful ginseng cultivation.
Ginseng is a perennial plant from the Araliaceae family, native to the mountain forests of East Asia. Its thick, fleshy root contains active compounds called ginsenosides, which are responsible for its medicinal effects. Traditional Chinese medicine has used ginseng for thousands of years to strengthen the immune system, improve mental performance, and support overall vitality.
Home cultivation offers several advantages:
Quality nutritious soil is absolutely essential for ginseng cultivation. This plant is extremely sensitive to soil conditions and won't thrive in unsuitable substrate.
Ginseng requires well-draining, humus-rich soil with specific characteristics:
Before planting, prepare the substrate properly:
Ideal mix: 40% garden soil, 30% compost, 20% leaf mold, 10% perlite or coarse sand.
In nature, ginseng grows in the undergrowth of deciduous forests where it receives only diffused light. Direct sunlight is harmful and can destroy the plant.
For successful cultivation, you need to provide 70-80% shade:
Shade intensity should vary throughout the year:
Ginseng requires balanced soil moisture - neither too dry nor waterlogged. This is one of the most challenging aspects of cultivation.
Water needs change throughout the year:
Watch for these symptoms of improper watering:
Ginseng is adapted to temperate climate with distinct seasons. This cold-sensitive period is necessary for proper development.
Ginseng prefers higher air humidity around 60-80%. In dry conditions, you can increase humidity by:
Ginseng can be grown from seeds or purchased roots (rhizomes). Each method has its advantages and disadvantages.
This is a long-term but rewarding process:
Faster method for obtaining mature plants:
Ginseng is sensitive to over-fertilizing. Less is more here.
Avoid these fertilizers:
Ginseng is susceptible to various diseases, especially in improper conditions.
Fungal diseases:
Prevention:
Pests:
Patience is rewarded - quality ginseng roots mature in 4-6 years, ideally even longer.
Dried ginseng root can be stored for several years in a dry, dark place. Use:
Growing ginseng is a long-term project requiring patience, attention, and adherence to specific conditions. Quality nutritious soil, constant shade, and moderate watering are the three pillars of successful cultivation. While it's a demanding plant, properly grown ginseng will reward you not only with valuable medicinal root but also with unique gardening experience.
Remember that ginseng is protected in many countries, so always use cultivated plants and never harvest from the wild. With the right approach and sufficient patience, you can grow this valuable plant right in your own garden.
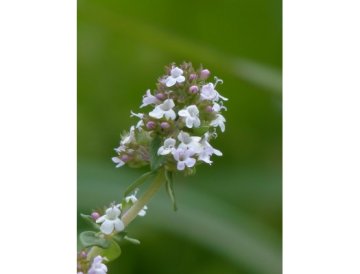
Cultivation – sheltered, sunny location, sandy-loam, slightly calcareous, light soil, moderate watering during dry periods

Canadian goldenrod is a tall annual that grows well even in poor soils, in sunny locations and partial shade. It requires minimal watering, making it ideal for less demanding growers. Moreover, it has medicinal properties and its flowering herb is a valuable herb for bronchitis and metabolism problems.

St. John's wort (Hypericum perforatum) is a popular perennial herb known for its bright yellow flowers and remarkable medicinal properties. It is an undemanding plant that thrives well in standard garden substrate in a sunny location or partial shade. It requires moderate watering and is suitable not only for herb beds, but also for drying for tea or preparing homemade tinctures.

Peppers need warmth, sun, nutrients and regular watering. They thrive best in moisture-rich soil and a sheltered location. Thanks to their high vitamin C content, they are an excellent prevention against colds. Learn how to successfully grow peppers in your garden too.
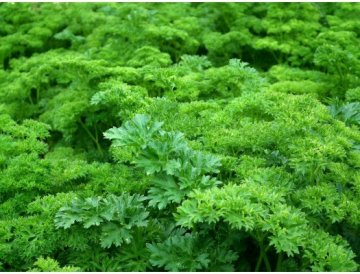
Herbs in pots need thorough watering at least once a day. Especially with small pots during hot summer days, watering is necessary even twice a day.
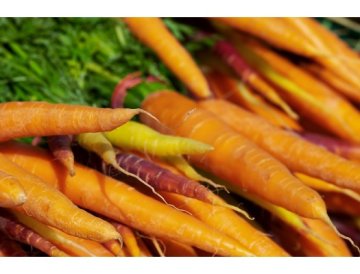
Carrots are not only a healthy root vegetable, but also a valued helper for eyesight, skin and body detoxification. They thrive in nutritious, alkaline and sandy soil, in a sunny or semi-shaded location with moderate watering. Read on to learn which varieties to choose for direct consumption, drying or long-term storage and how to grow carrots properly.
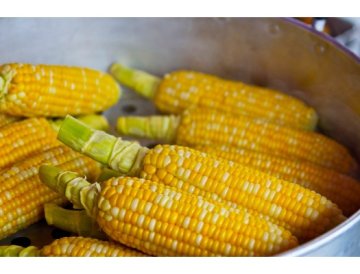
Corn is a popular crop with a rich history dating back 2,500 years. Today, it is grown for direct consumption, canning, or popcorn production. Growing corn requires a sunny location, generous watering, and well-drained sandy loam soil.
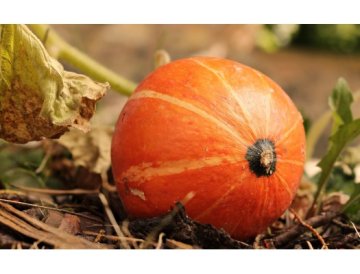
Pumpkins are not only tasty and healthy, but also very decorative. This climbing annual is highly popular not only in the kitchen, but also in the garden. Growing pumpkins requires medium-heavy soil rich in nutrients and plenty of sunlight.
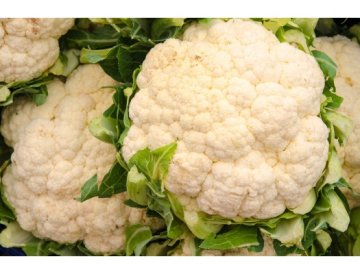
Cauliflower grows best in a sunny location with light loamy soils rich in nutrients and moisture. It's important to water at least once every two weeks, ideally with rainwater or settled water. Cauliflower doesn't tolerate drought or waterlogging – maintain balance.
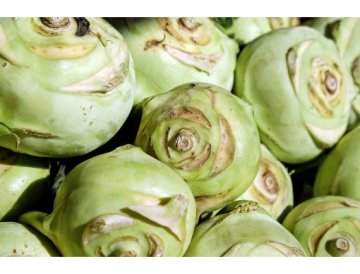
Kohlrabi grows best in medium-heavy loamy or sandy-loam soil that is rich in humus. Even and regular watering is important, as well as choosing a sunny location. It's advisable not to use fresh manure, which can cause deformation of the bulbs.
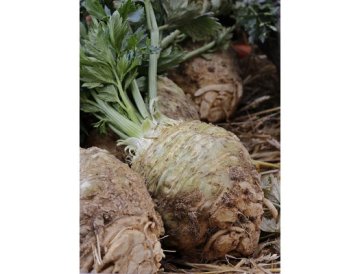
Growing celery - sufficient watering (avoid watering the leaves), regular hoeing, celeriac - loamy, humus-rich soils, leaf and stalk celery - sandy loam soils
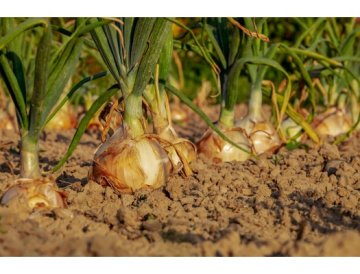
Onions require a sunny location and nutrient-rich soil – but avoid fertilizing with fresh manure. Regular watering and proper care during growth are essential. You'll be rewarded with high yields and powerful medicinal properties.
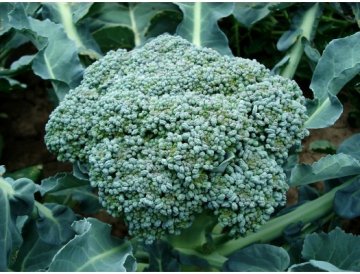
Broccoli is a popular vegetable with a high content of vitamins and minerals. It thrives in permeable, loamy-sandy soil with sufficient calcium and regular watering. Thanks to its beneficial properties, it should be part of every healthy diet.

Cabbage is a popular biennial vegetable that has been cultivated since ancient times. It thrives in well-drained soil rich in nutrients and requires regular, sufficient watering. Annual crop rotation is recommended to reduce susceptibility to diseases.
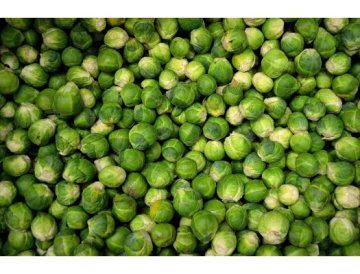
Growing cabbage – it thrives in medium-heavy, humus-rich, loamy soil. It requires abundant summer watering, a partially shaded to sunny sheltered location.
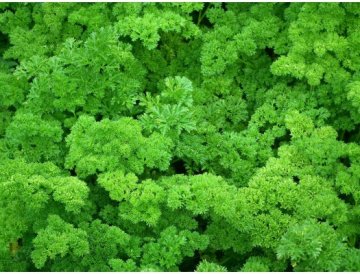
Growing parsley – it thrives in light, slightly acidic soil with sufficient moisture. Choose a sunny or partially shaded location and don't forget regular watering.
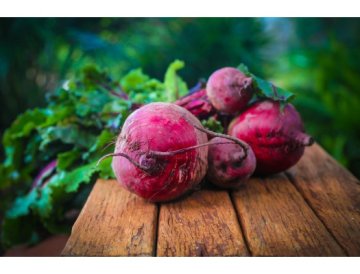
Beet is beneficial for health and its cultivation is not complicated. It requires soil with sufficient nutrients that is neither acidic nor freshly fertilized. It thrives in a sunny location and needs watering mainly during warm, dry summers. Discover what types of beet exist and what they are suitable for.

When establishing a lawn, it's important to choose correctly. What, you ask? First and foremost, grass seed. Not only is soil composition crucial, but also the activities your lawn will need to withstand - garden barbecues, children playing, your pets spending time there. The choice is also influenced by factors such as whether it will be exposed to sun or shade.
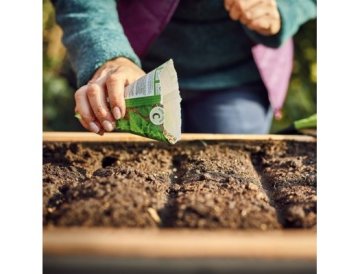
The days are gradually getting longer, making it the perfect time to plan your spring garden preparation. Once the snow cover, which was abundant this year, melts away, you can start getting your garden ready after winter. We bring you 13 tips to help prepare your garden for the new season.
Although June is just around the corner, there are still vegetable species and varieties that you can sow in unfilled beds. You might even be surprised by their wide selection.

Growing calendula - standard garden substrate, exclusively sunny location, moderate watering
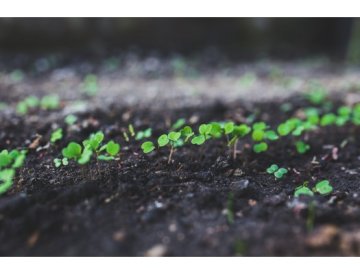
Arugula, also known as rocket, is an undemanding leafy green vegetable that you'll love not only for its spicy flavor, but also for its high content of vitamin C and beta-carotene. It supports body detoxification and improves digestion. You can easily grow it even on a balcony if you follow a few simple principles. Read on to learn how to do it step by step.
Choose from 100 tomato varieties. Find exactly what you want – for example by sowing month.
Everything you need for growing and gardening in one place. One shipping fee only. We even started roasting our own coffee.
Whenever needed, I’ll tell you what to do and when. Try my Growing School. You’ll never miss a harvest again.
No need to pay for shipping. Shop over €80 and I’ll cover it for you.
I agree to the processing of personal data.